I am the author of iOS 17 Fundamentals, Building iOS User Interfaces with SwiftUI, and eight other courses on Pluralsight.
Deepen your understanding by watching!
Adding Buttons to the Navigation Bar with Storyboards
Updated on March 20, 2017 – Xcode 8 & Swift 3
If you’re having trouble figuring out how to add buttons to the navigation bar in your Storyboard-based iOS app, my goal in this article is to help you through the process. Knowing what to click and where to drag to get things wired up isn’t entirely intuitive, so I want to be of help if I can.
Lots of StackOverflow posts point us to just adding the buttons in code, but for those who lean toward trying to do as much in the Storyboard designer as possible, this approach feels out of place.
The example I’m outlining here is done solely in the Storyboard.
Example scenario
The scenario is as follows:
- We have a main screen with an add button in the top right of the navigation bar
- Pressing Add will display a modal screen with two buttons in the navigation bar: Cancel, and Save
The Goal: Use only the Storyboard to add the ‘Add’ button, and the Cancel and Save buttons to the navigation bar. The end result will be something like this:
An example git repository has been created for this walk-through over at GitHub:
Main Storyboard scene setup
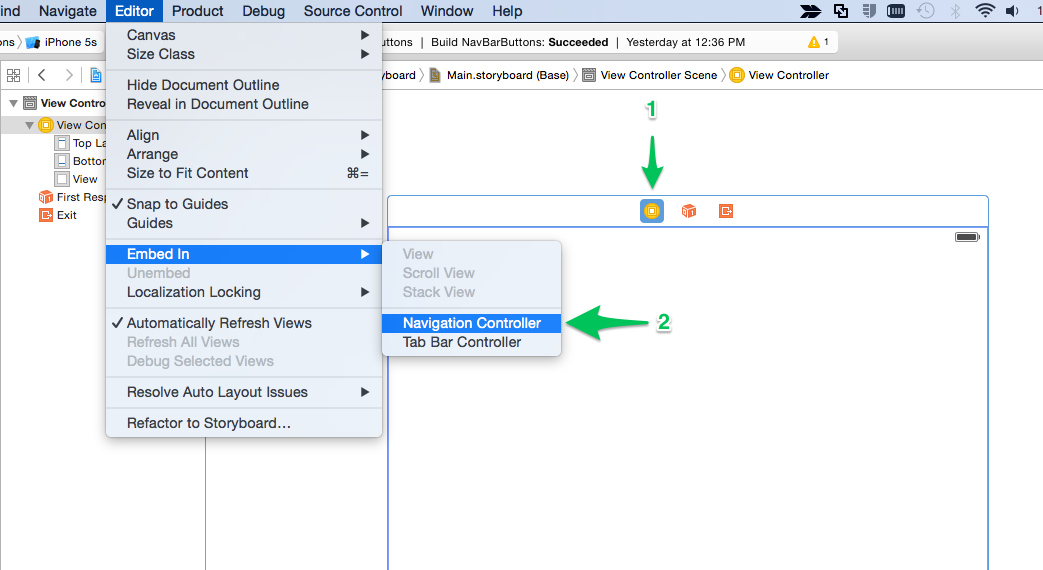
The very first thing you need to do in order to get the add button to show up in the navigation bar is to embed your view controller in a navigation controller.
Select your view controller and choose Editor > Embed In > Navigation Controller:
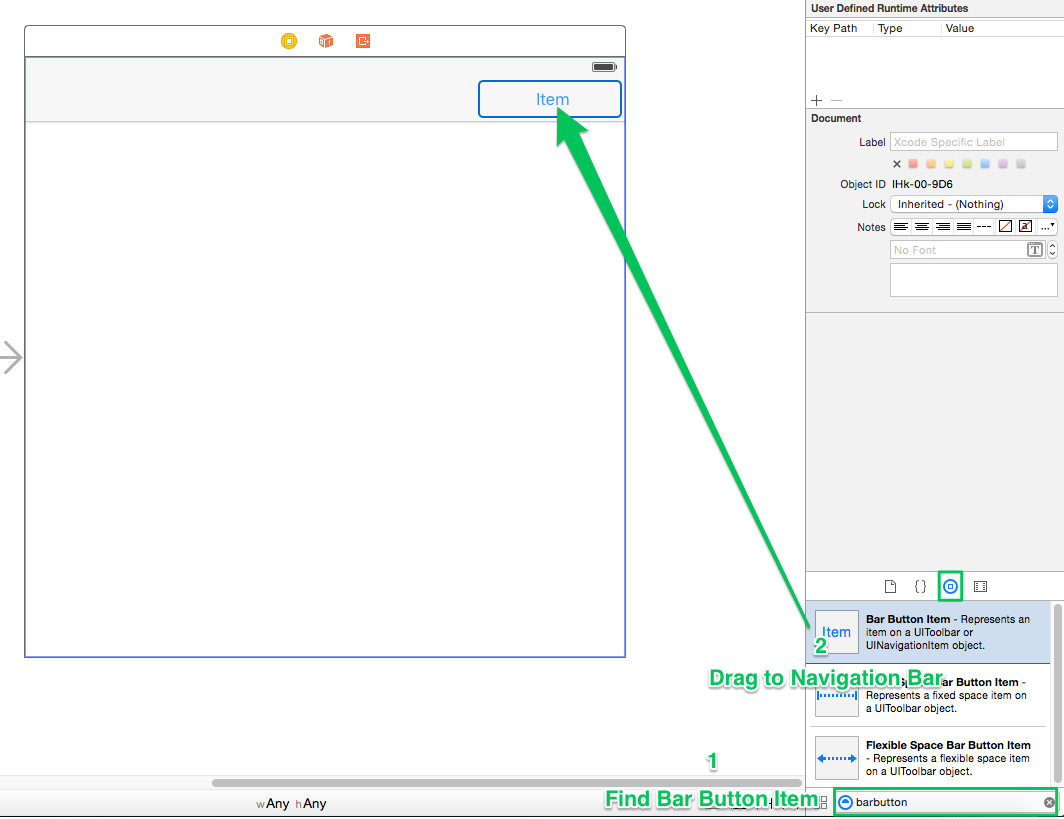
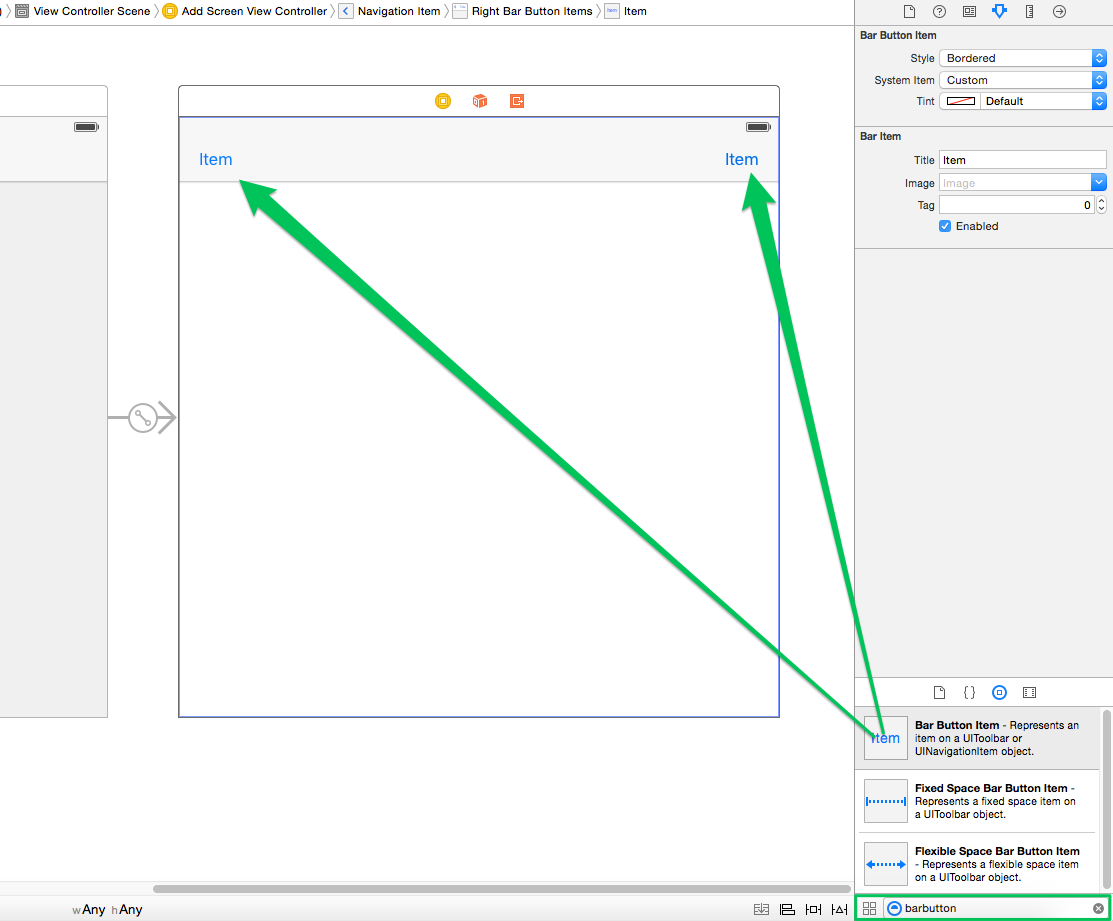
Next, you need to search for a Bar Button Item from the Object Library in the Utilities Pane. Once you find it in the list, drag one up to the upper-right of the navigation bar:
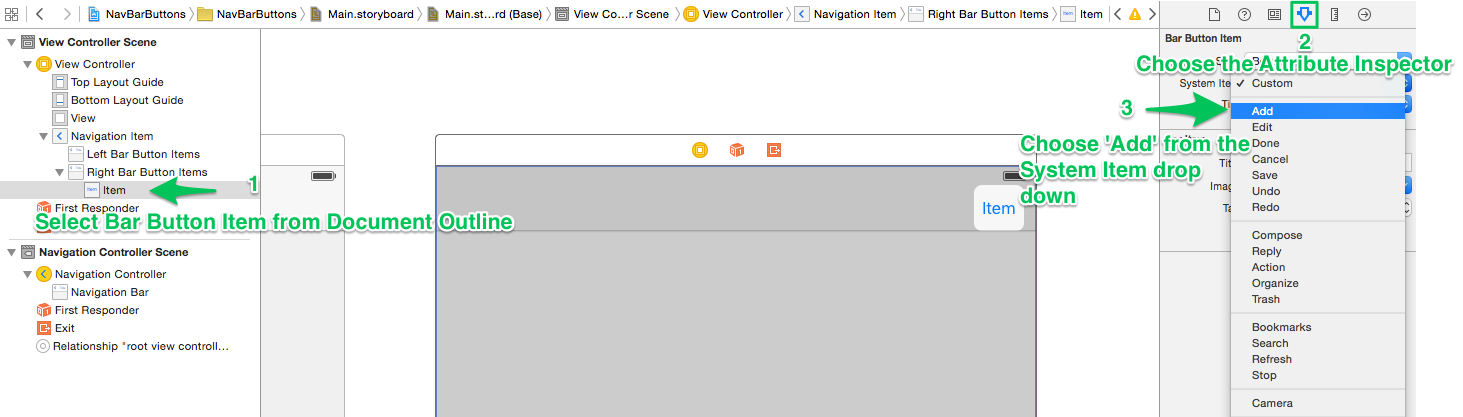
To turn it from an “Item” button into a “+” button, you need to adjust the Bar Button Item’s attributes. Click on the button, either in the navigation bar itself or on the document outline for the Storyboard, and choose the Attributes Inspector for the control.
Then change the System Item property from “Custom” to “Add”:
That’s all there is to setting up that first scene. You’ll wire up the add button to modally show the “Add” scene in the next section.
Add Storyboard scene setup
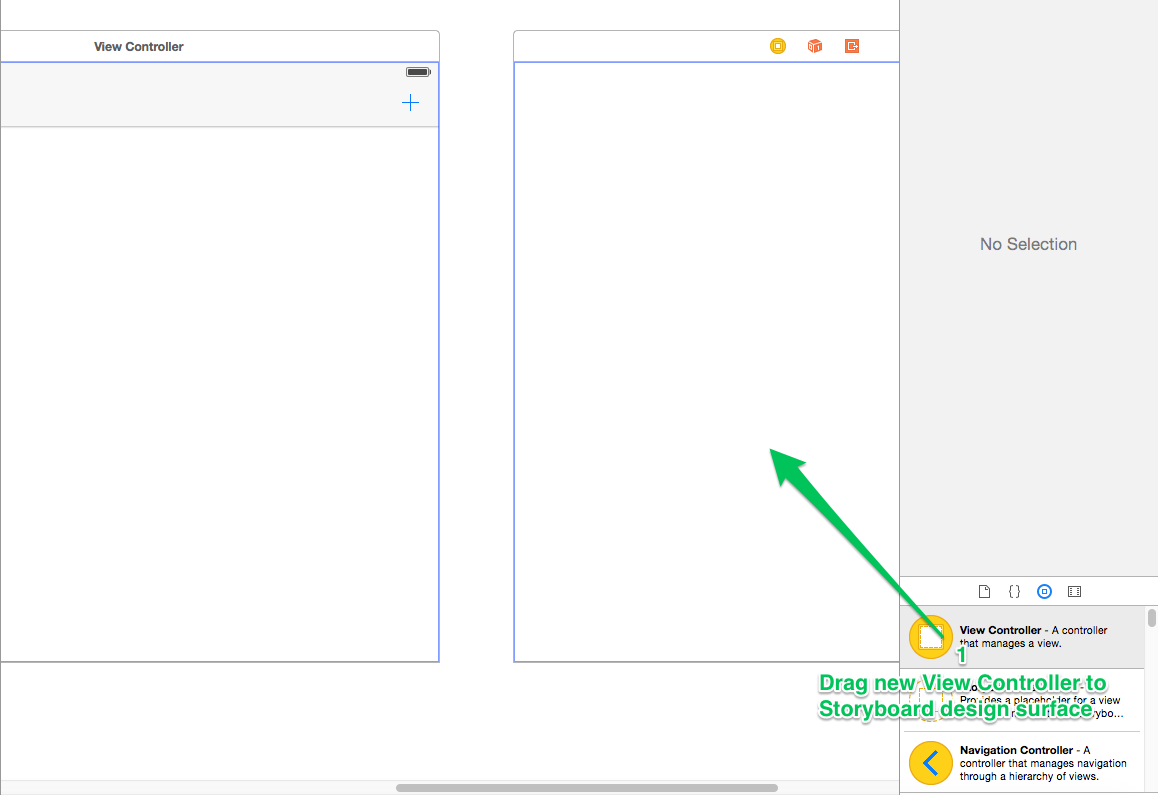
Next up, you need an “Add” scene. For that, another View Controller is required. Drag out a new View Controller onto the Storyboard design surface. While you’re at it, go ahead and create a new AddScreenViewController class:
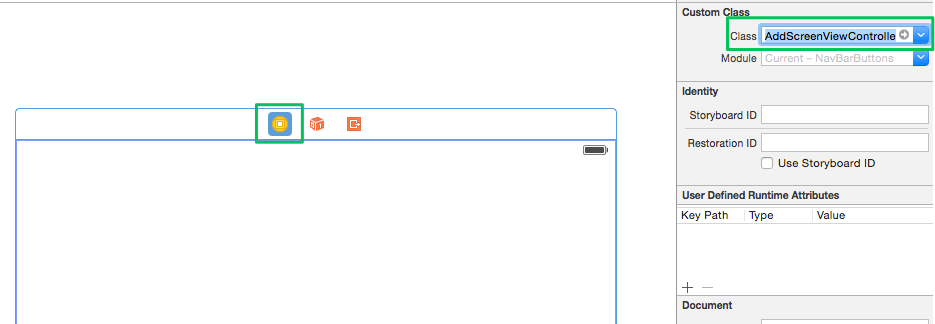
Once you’ve created a new AddScreenViewController class from the File > New > File dialog, make sure you’ve wired it up appropriately:
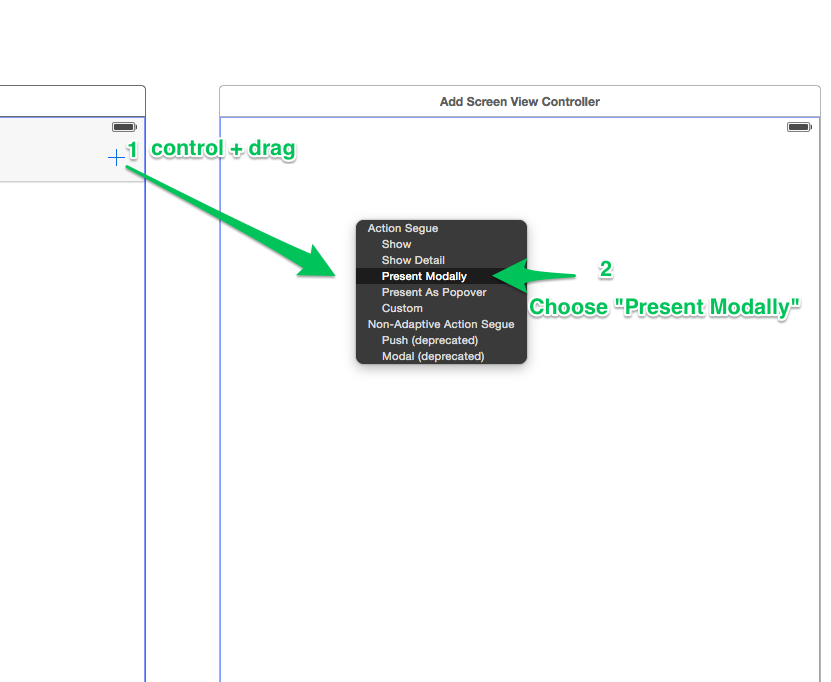
Now, to get this “Add” screen to show modally, you need to control + drag from the “plus (+)” button on the first view controller, over to the new AddScreenViewController you just dragged onto the Storyboard. Select “Present Modally” from the popover:
Now, the problem you’ll run into at this point if you run the app is that, while tapping the ‘Add’ (+) button does in fact present the Add screen modally, 1) There’s no way to dismiss the modal controller to go back to the main screen, and 2) There’s no navigation bar to add buttons to!
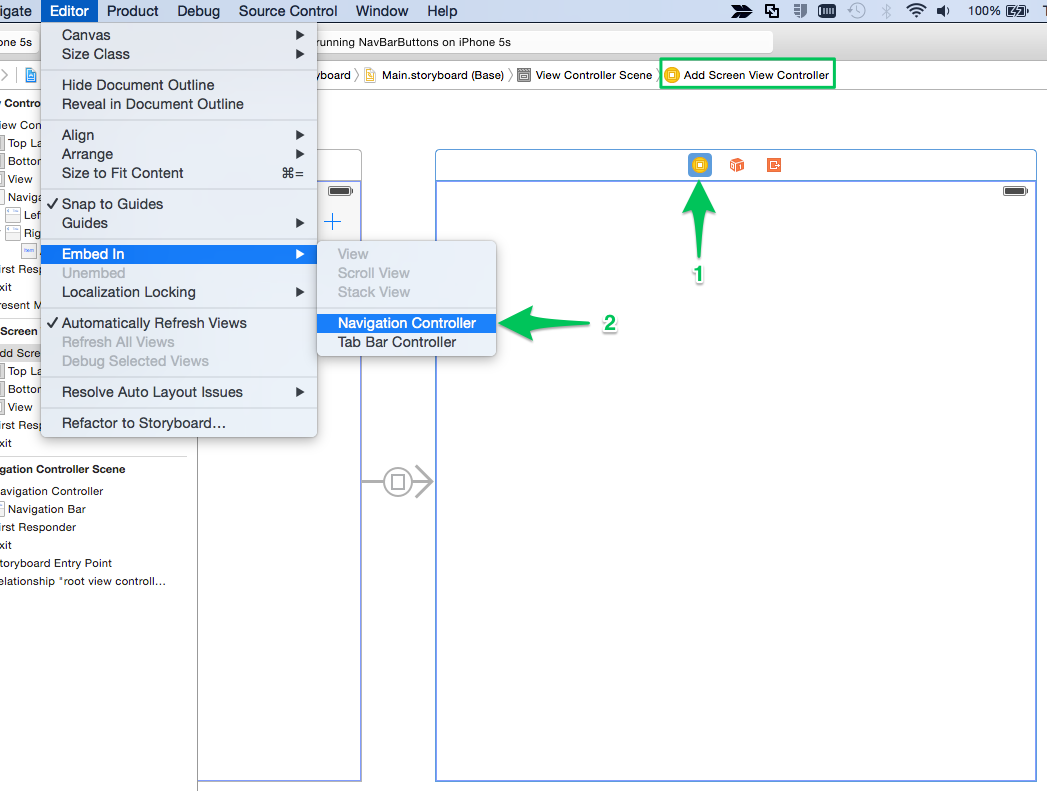
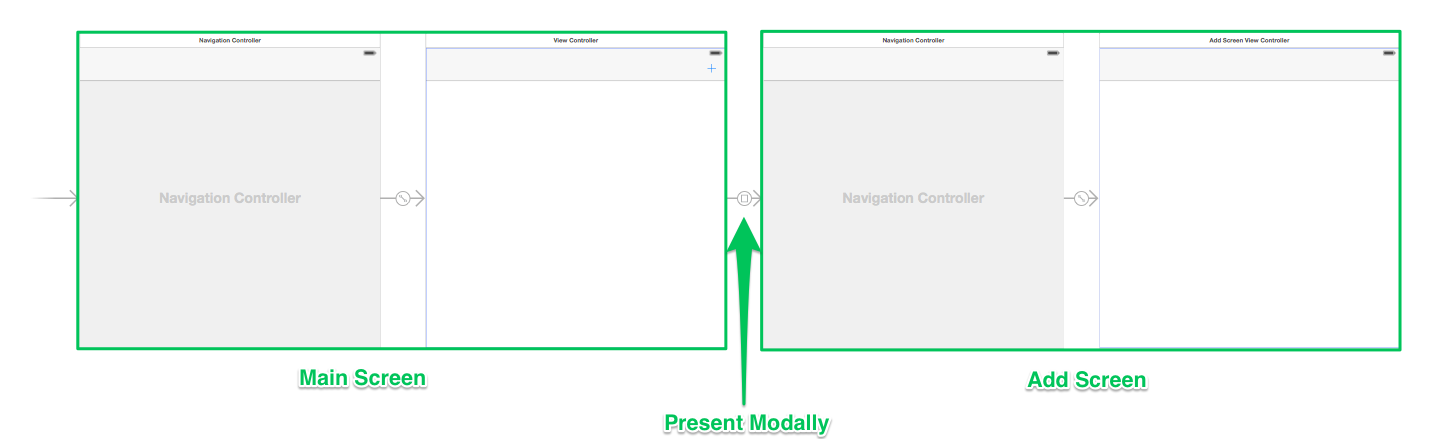
So, the trick to get a navigation bar in place so that you can add our ‘Cancel’ and ‘Save’ buttons is to embed the Add Screen View Controller in… you guessed it… a Navigation Controller:
Once this is done, your storyboard should look something like this:
Now all that’s left to do is to drag two Bar Button Items up to the navigation bar, just like we did for the “Plus” (+) button on the main screen:
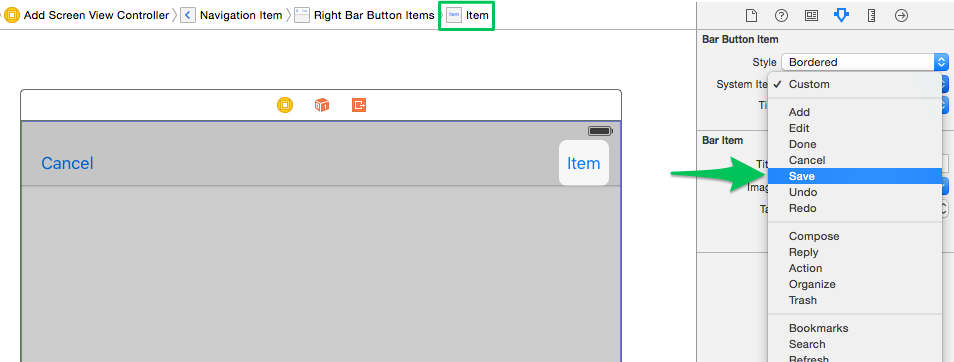
Changing each of their System Item properties in the Attribute Inspector, just like we did before, will give them their “Cancel” and “Save” appearance:
If you control + drag the ‘Cancel’ and ‘Save’ buttons from the Storyboard scene to the .swift code file, you’ll be able to wire up IBActions to dismiss the view controller and return to the main screen. I won’t explain that step here, since the goal was to show you how to add the buttons themselves, but the example project on GitHub has the view controller dismissal implemented if you care to review it.
Wrapping up
That’s it! Buttons in the navigation bar, all done inside the Storyboard.
Hopefully this quick walk-through removes any stumbling blocks you might have in designing your Storyboard-based app with navigation controllers.