I am the author of Core Data Fundamentals with Swift, CloudKit, iOS Data Persistence: The Big Picture, and eight other courses on Pluralsight.
Deepen your understanding by watching the courses!
Sharing a Core Data Model with a Swift Framework
Updated on June 13, 2017 – Swift 3.0, Xcode 8
Code re-use is a powerful thing, but it’s not always easy to pull off. We strive for it though, because in the long run, it makes maintaining the code far, far easier than if we just settled for copying and pasting.
With the introduction of dynamic frameworks in iOS 8, a world of possibility opened up for iOS developers to achieve some pretty cool re-use scenarios, one of which we’re going to dive into today.
Not only can we share code between projects, we can also share Core Data models between projects by utilizing frameworks!
Perhaps you’re working on an iOS + Mac app combination and the data model for each is identical. Maybe you’re building several iOS apps that have different user interfaces but share some underlying persistence-layer models. Whatever the case may be, wouldn’t it be awesome to design the Core Data model once and share it between your projects?
Example scenario
Our working example for this walkthrough will be the following:
Our team is building an iOS app and a Mac app and the underlying data model will be exactly the same between them. The only difference between the apps will be the target platform.
The app will target car enthusiasts everywhere – we will empower car fanatics to manage of a list of their favorite cars.
We’ll be creating two Xcode projects during this walkthrough: One will be the framework and will be called “CarKit”. The other will be a single view iOS application. We won’t actually dive into the Mac project, but one could imagine the process being very similar for importing CarKit into the Mac application when it came time to build that one.
I’m providing a completed CarKit + Carz package for you to look at over at GitHub:
Let’s get started!
Creating a Swift framework project
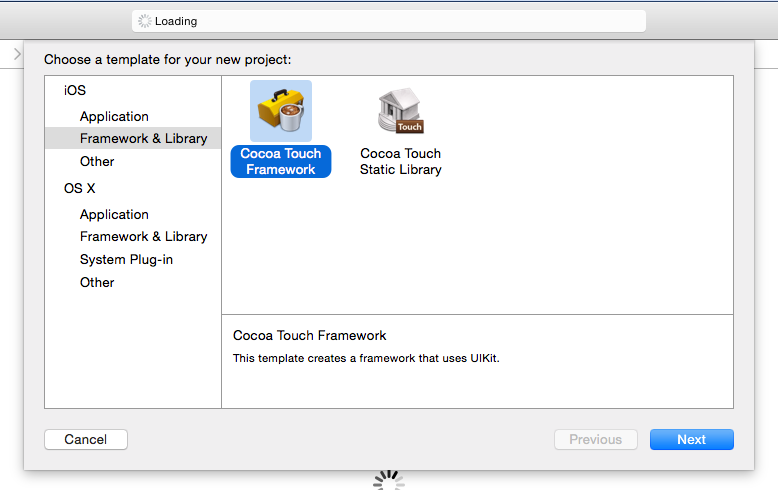
To get started with creating a Swift framework, begin with Xcode’s New Project dialog (File -> New -> Project…). Typically we stay in the realm of the “iOS Application” project templates, but if you click “Framework & library”, you’ll see the option to create a new Cocoa Touch Framework:
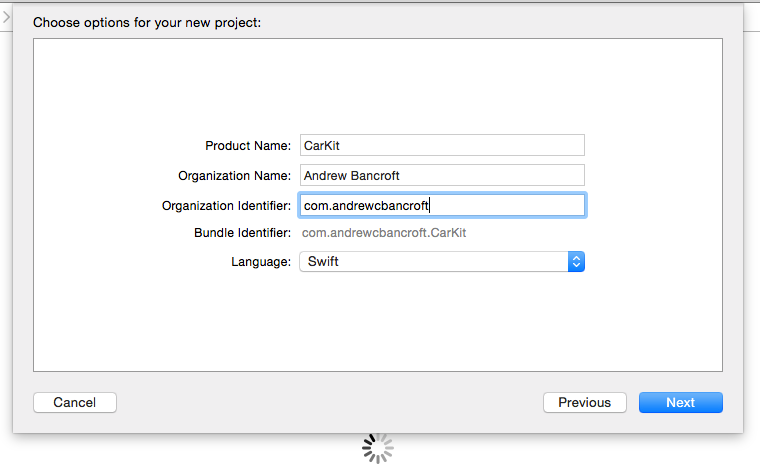
In keeping with Apple’s “___Kit” theme, we’ll name our framework “CarKit”:
Add a data model file
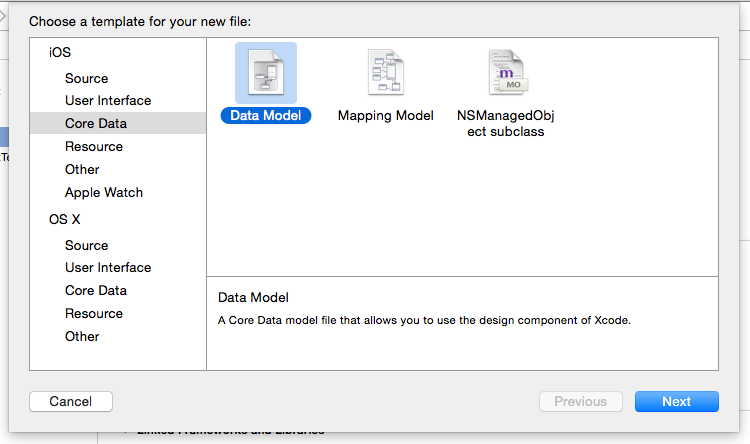
Once the framework project has been created, we’re set to drop in a new Data Model file from Xcode’s new file dialog (File -> New -> File…). Choose Core Data, and then Data Model:
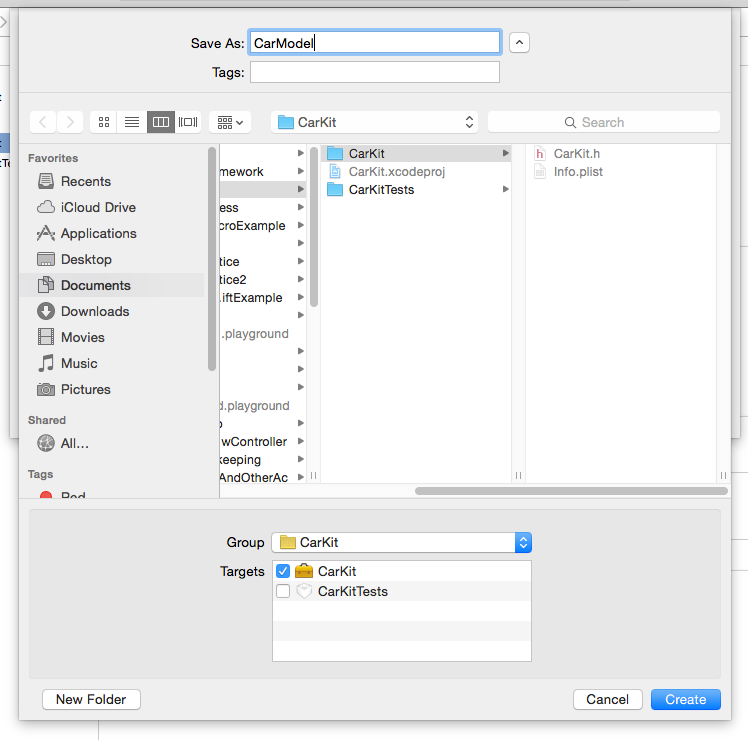
Give the data model file a name that seems to fit your situation. For our example, let’s name it “CarModel”:
Add model attributes
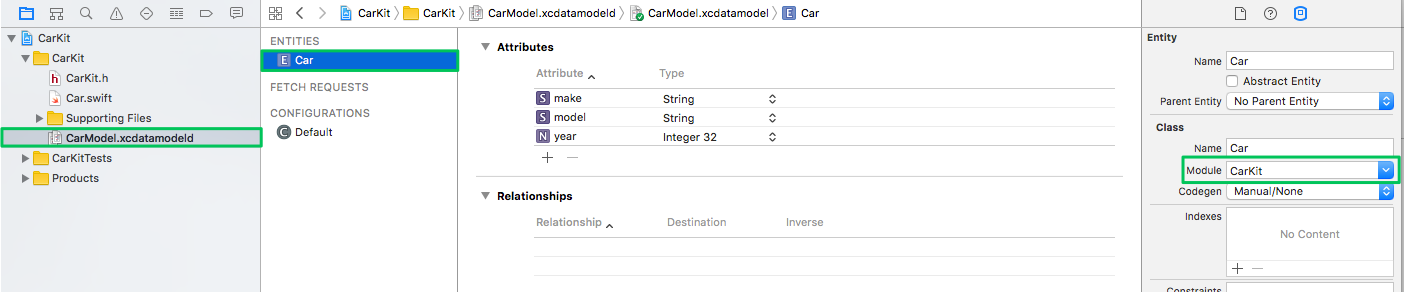
Next it’s time to actually add attributes to the model. Since our theme is cars here, we’ll stick with three simple attributes: year, make, and model:

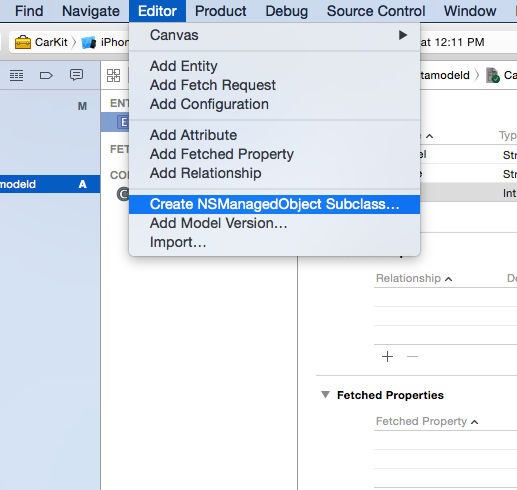
Create NSManagedObject subclass
With the model attributes all configured, it’s time to create an NSManagedObject subclass. This will make consuming the model much easier in client applications. I’ve actually written up a full walk through on creating an NSManagedObject subclass in Swift as there are some nuances. Feel free to read up on that if you so desire!
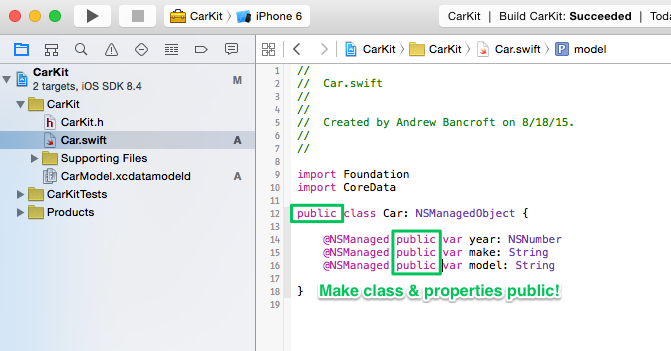
Be absolutely sure to mark your NSManagedObject subclass and its properties public – otherwise, the client app won’t be able to see the class or its properties:
As I point out in Implement NSManagedObject Subclass in Swift, you need to set the Module property in the Data Model Inspector to be CarKit (which is the same as the “Current Project Module” option for this example):
Build and inspect outputs
We’ve got a framework, and we’ve got a Data Model with attributes and an NSManagedObject subclass all appropriately implemented. Now it’s time to build the project and inspect the output of the build!
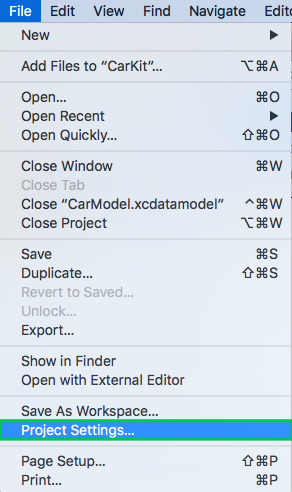
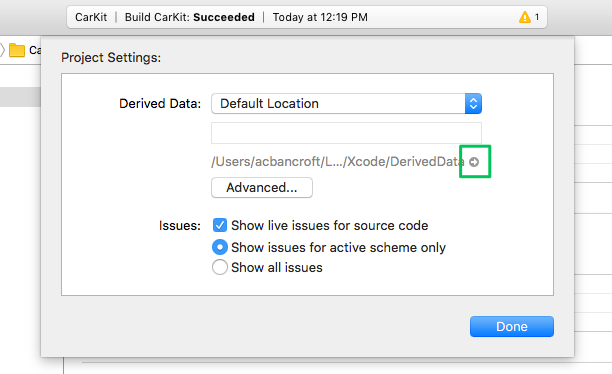
Command + B to build, and then head up to the File menu and choose Project Settings:
In the Project Settings area that appears, click the small gray arrow under the “Derived Data” section:
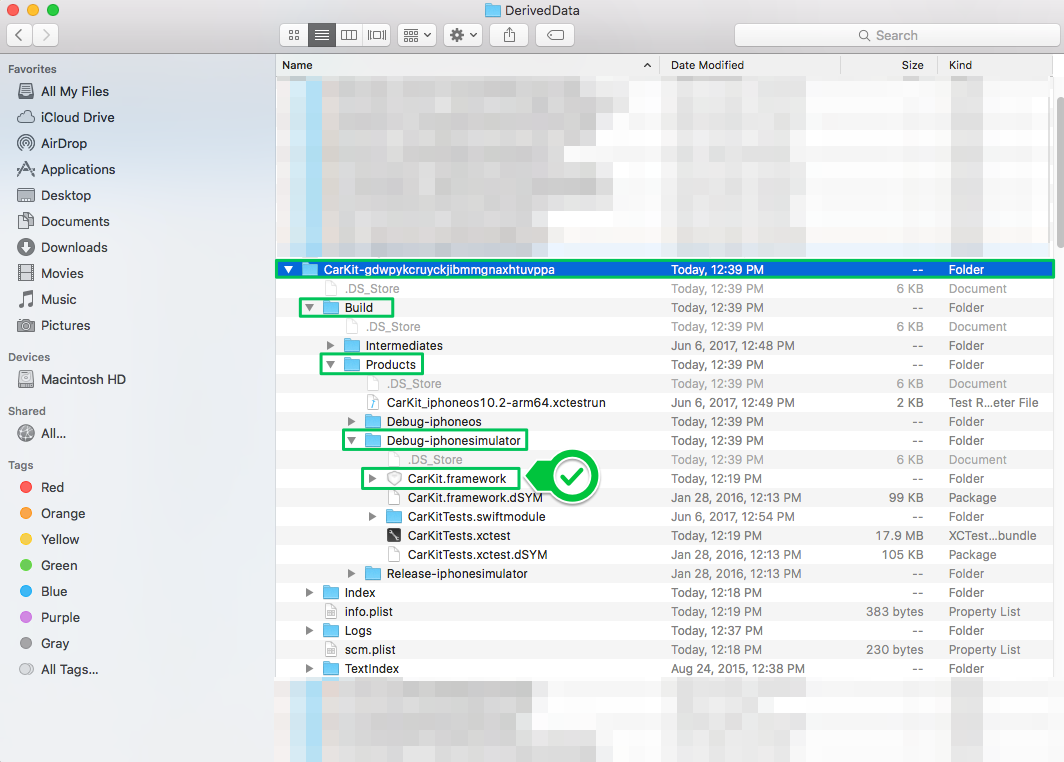
Next, find the derived data folder for your project. It should be named the same as your project with a set of random characters after. Sometimes there will be multiple folders that could be your project. You can look at the last modified date to help figure you figure out which one was most recently built and choose that one.
Expand the Build folder down to Build -> Products -> Debug-iphonesimulator. There you should see the CarKit.framework artifact, and within it, everything that’s needed to be able to utilize the data model in a client application. Awesome!
Note: This framework is not production-ready. It’s a little more involved to create a framework that one can run on a device / pass validation when submitting to the app store. The development of the framework remains the same, but the build phases and procedures must be modified to make it “universal”. Rather than overly complicate this walkthrough, I recommend reviewing “Universal Cocoa Touch Frameworks for iOS 8 – (Remix) by @kodmunki to create a “universal” framework capable of being run in the simulator and on iOS devices.
Creating the framework-dependent app
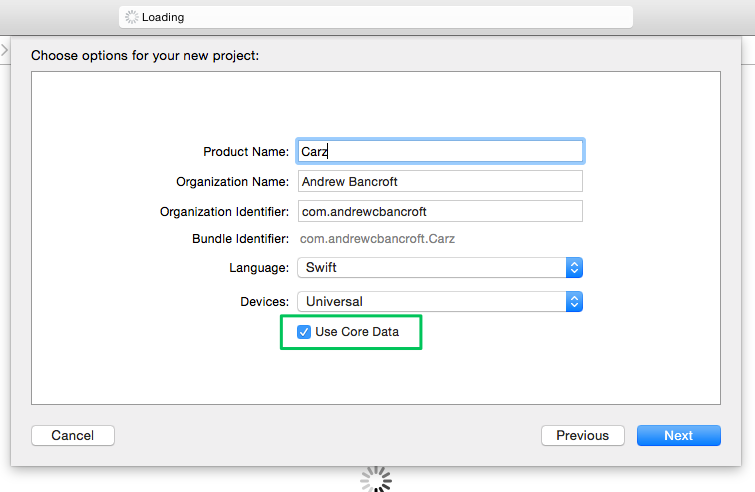
With the framework built, it’s time to create the iOS app that will utilize that framework and its packaged assets! Begin a new project from File -> New -> Project and select “Single View Application”. I’ll name our example app “Carz”. Ensure that “Use Core Data” is selected so that you get the boilerplate Core Data code put into your project by Xcode:
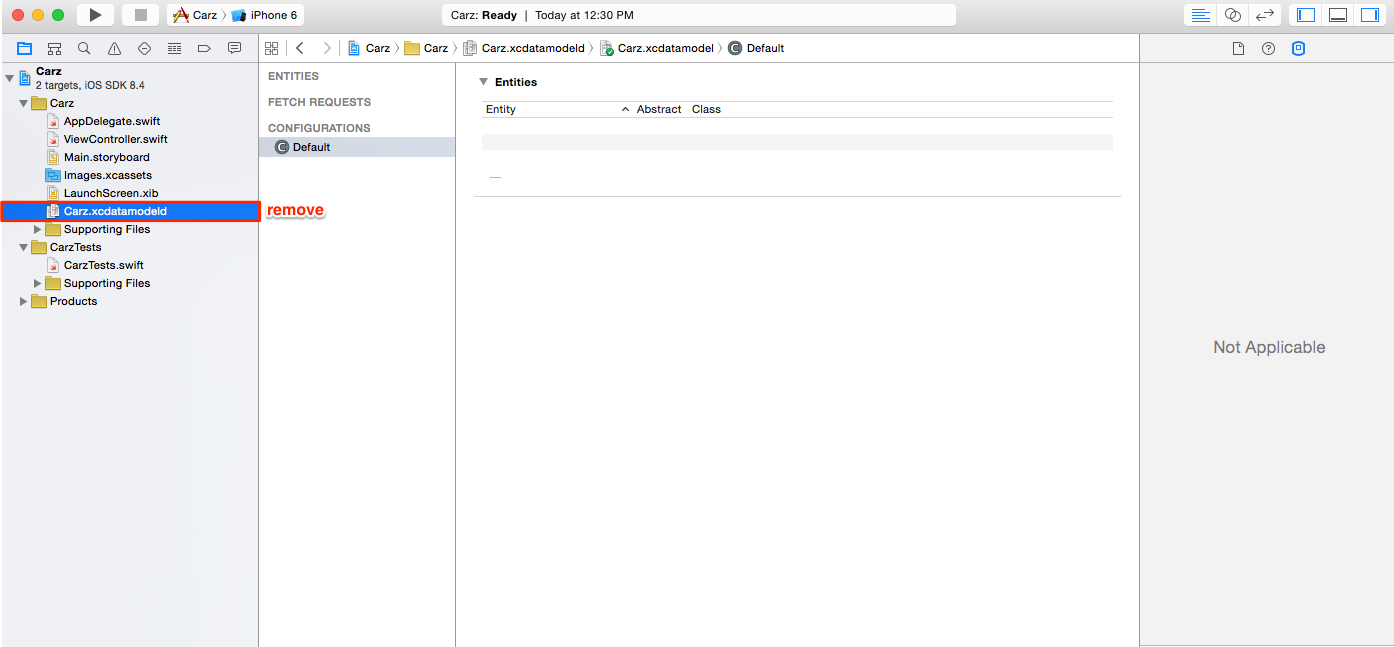
Remove Xcode-generated .xcdatamodeld file
When you select “Use Core Data” in the project creation window, Xcode automatically generates some boilerplate code, which we want. But it also gives us a “Carz.xcdatamodeld” file, which we will not need because we’ll use the model that’s found in CarKit. Remove the “Carz.xcdatamodeld” file that Xcode provides for you:
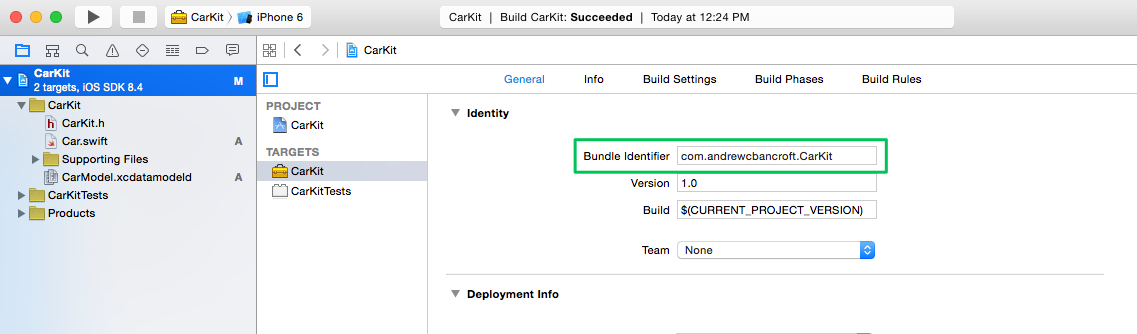
Obtain framework Bundle Identifier
Speaking of using the CarKit Core Data model, we’re now ready to configure that piece of the app. To do this part, you will need to know the Bundle Identifier from your framework project. To find out what it is, jump back over to the framework project, click the top-level node in the project navigator, click on the framework target name, and look under the General tab of the project configuration. There you’ll find the Bundle Identifier, which you can copy to your clipboard:
Replace managedObjectModel property initialization
Out of the box, Xcode generates some code to help locate your Core Data model file. The boilerplate managedObjectModel property looks like this:
|
|
mainBundle(). This is why we jumped over and copied the Bundle Identifier for CarKit in the previous step. To locate the data model file in that bundle, you’ll replace the managedObjectModel initialization step to the following (for CarKit):
|
|
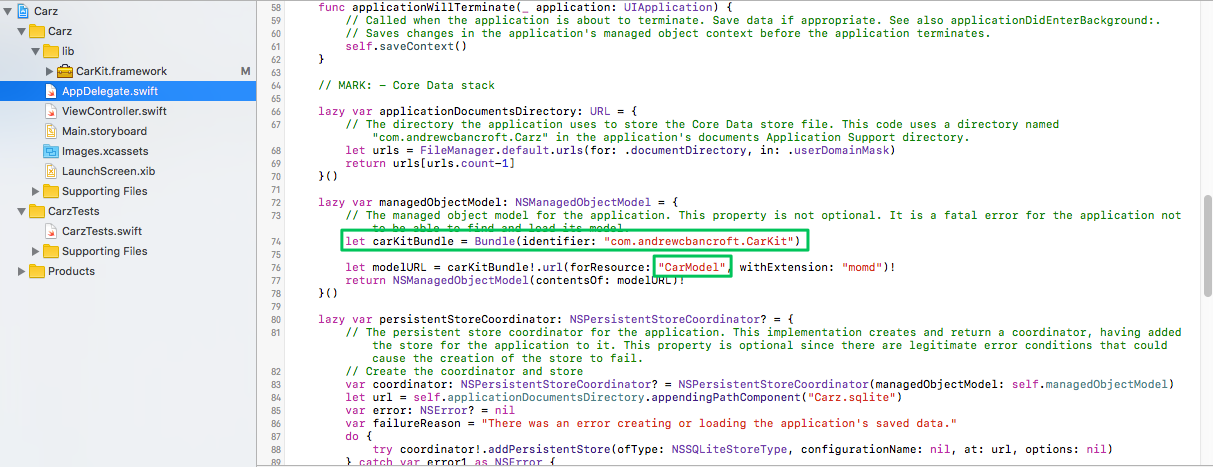
Recall that “CarModel” is the name of the Core Data model we created for the framework in CarKit. We simply look for that artifact by calling URLForResource:withExtension: on the carKitBundle to initialize an NSManagedObjectModel instance.
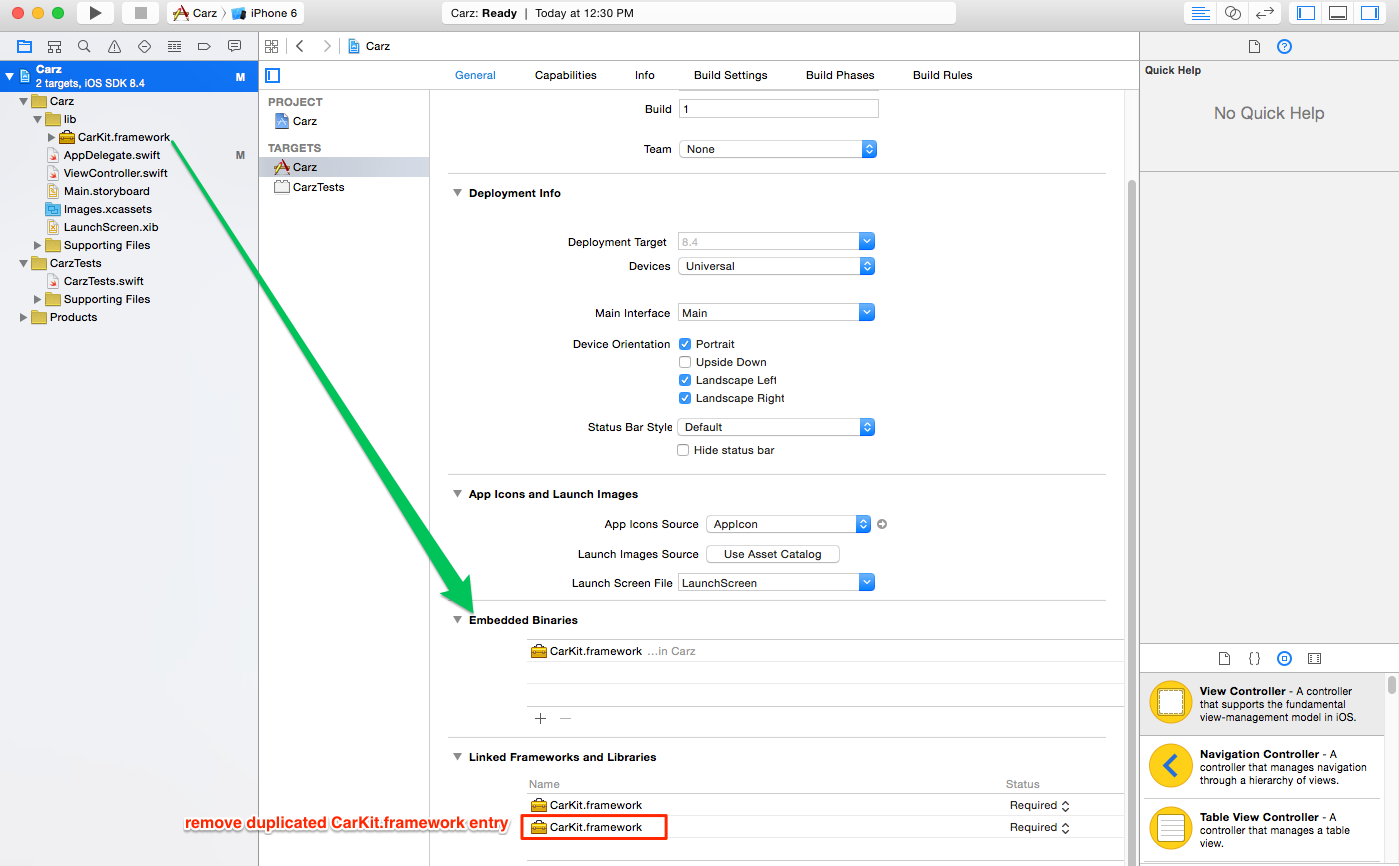
Add CarKit framework to project and embed binary
Now it’s time to actually bring in the framework for use within our app. I typically open up a Finder window and drag over a copy of the framework (in this case, the CarKit.framework file) into my project. Feel free to organize it into a “lib” folder.
Assuming that you go through all the necessary steps to make the framework production-ready, you’ll want to embed the binary and ensure that it’s referenced in the “Linked Frameworks and Libraries” portion of your project configuration:
Taking the model out for a test drive (pun intended)
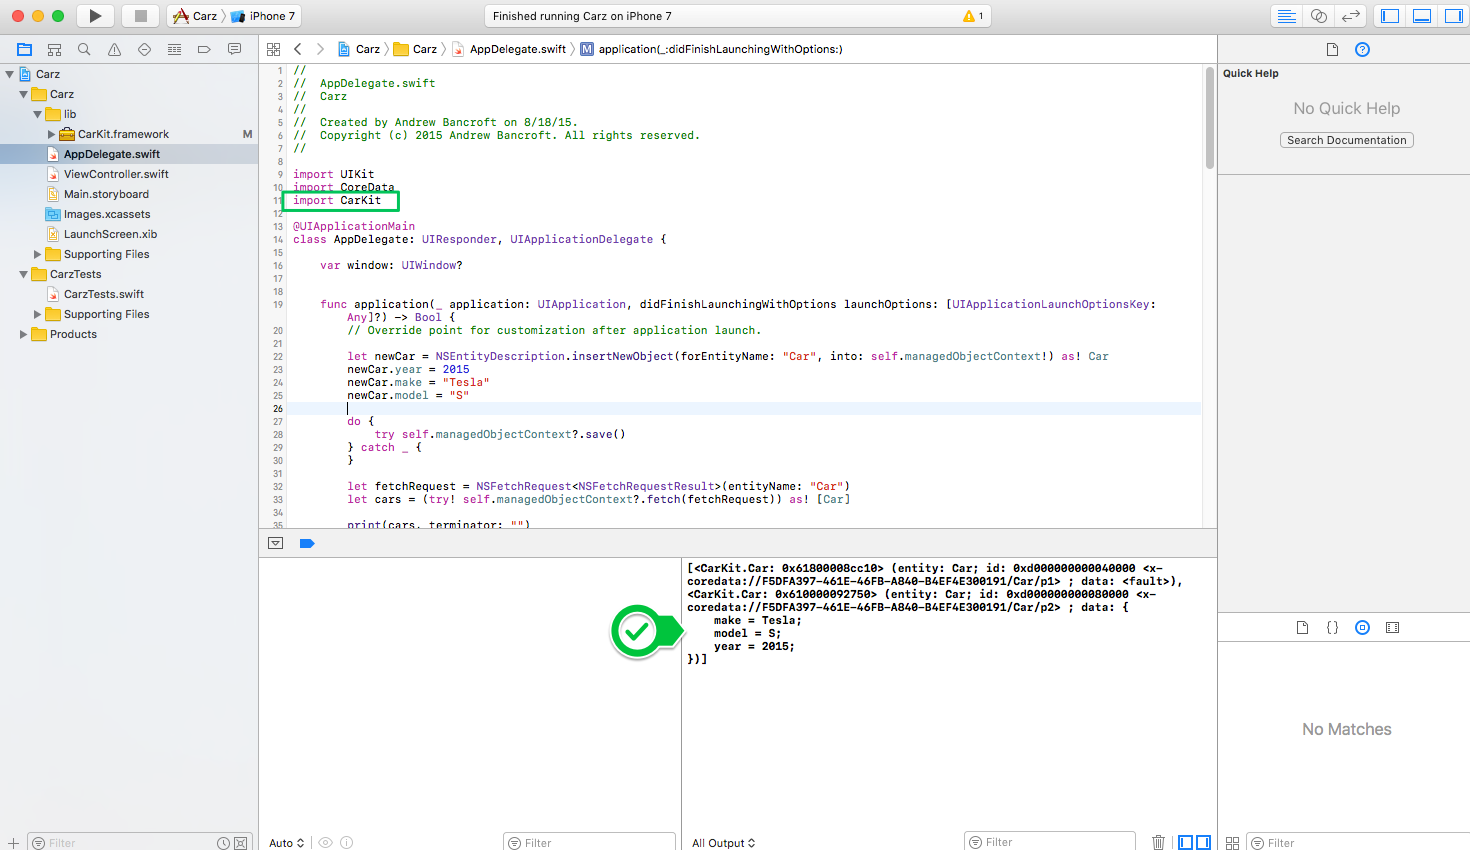
It’s simple enough to try things out by writing a simple little snippet of code in the AppDelegate:
|
|
managedObjectContext instance that’s configured in the AppDelegate.
Then it goes and performs a fetch request to grab all the Car objects and prints them. The results? See for yourself:
Wrapping up
This walkthrough guided you through the process of creating a framework for the purpose of sharing a Core Data model with multiple projects. My hope is that you’re now empowered to make use of _re_use by utilizing Swift frameworks to share even portions of your persistence layer!
