I am the author of iOS 17 Fundamentals, Building iOS User Interfaces with SwiftUI, and eight other courses on Pluralsight.
Deepen your understanding by watching!
Working with Unwind Segues Programmatically in Swift
Updated on September 20, 2016 – Xcode 8 & Swift 3.0
Navigating between screens is a critical component to building iOS applications. The mechanism for navigation in Storyboard-based applications is the segue. Using segues, we can travel ahead to the next screen, which is extremely common. We can also travel backward in the screen “navigation stack” by programming a special kind of segue called an unwind segue.
Embedding a view controller inside a navigation controller gives us some built-in forward and backward navigation, so you may be asking, “What’s the need for an unwind segue??”
Well, suppose that we need to programmatically trigger the backward navigation, based on an interaction with something other than the default “back” button on the navigation bar. How would you do it? Yep – you’ve got it: by using an unwind segue.
This is a walk-through of how to work with unwind segues programmatically in Swift.
Note: Code in the main article below is written in Swift 3.0, but code examples for Swift 2.3 are found in the example project.
Example
An example app called “Roasters on the Go” has been created for this walk-through to help give you some context. It’s a mock mobile order system for purchasing green, un-roasted coffee beans (so that you can roast them yourself)!
- We’ll start at a list of coffees categorized by region
- Tapping an coffee origin country will take you to the order screen
- Pressing the ‘Order Now’ button will simulate the placement of an order
- Tapping “OK” on the alert will trigger the unwind segue (which is the goal of this walk-through)
Here’s a sample of what the fake app does:
The goal is to go back to the list of coffee origins after ‘OK’ is pressed on the alert. Let’s look at the steps to make this happen.
1 – Create an unwindTo___ IBAction
The first step is to create an IBAction that we can wire up the unwind segue to.
Supposing that you’ve got two view controller: The MenuViewController which lists out the menu of coffees to purchase, and the OrderViewController which allows your app users to buy that particular coffee.
If we’re wanting to go from OrderViewController to MenuViewController, we need to create the IBAction in the MenuViewController:
1class MenuViewController: UITableViewController {
2
3    // ...
4
5    @IBAction func unwindToMenu(segue: UIStoryboardSegue) {}
6
7    // ...
8}
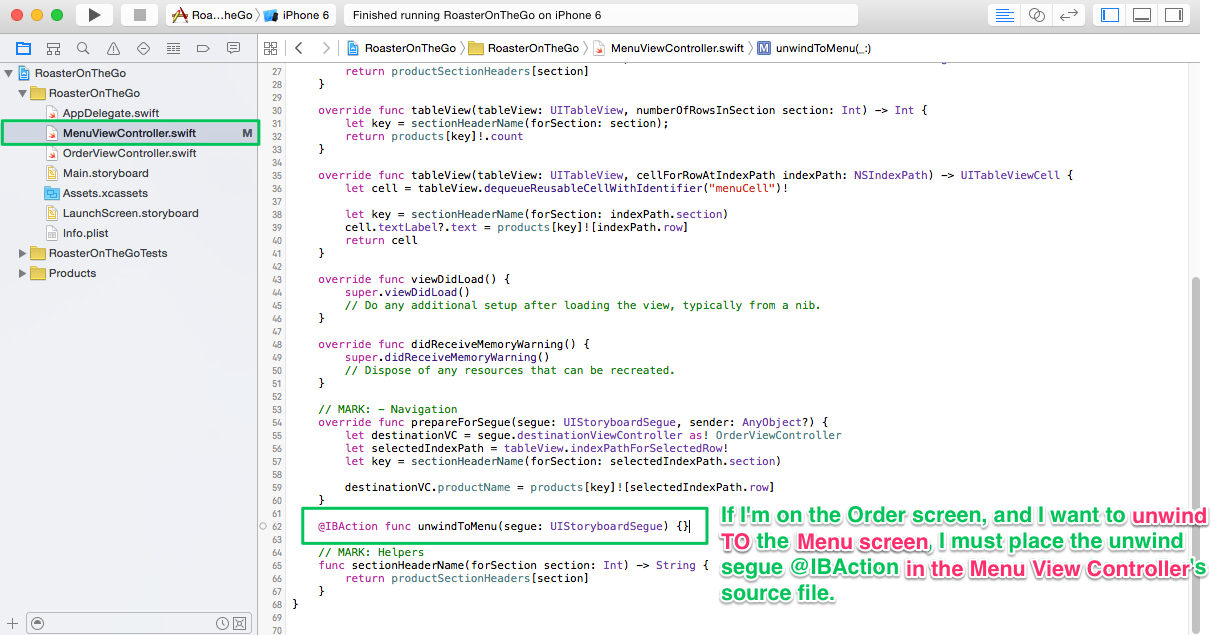
Placing the IBAction code in the right spot is critical to the functioning of the unwind segue. In this example where we want to go from Order to Menu, if you place the IBAction in the OrderViewController, the Storyboard will let you wire it up just fine, but the transition back to the menu screen will never happen at runtime.
Therefore, it’s important to remember: Place the “unwindTo___” IBAction function in the view controller source file for the screen you’re unwinding back to.
2 – Wire up the unwind segue
Next up is to wire connect the view controller to the unwind segue IBAction that we just created.
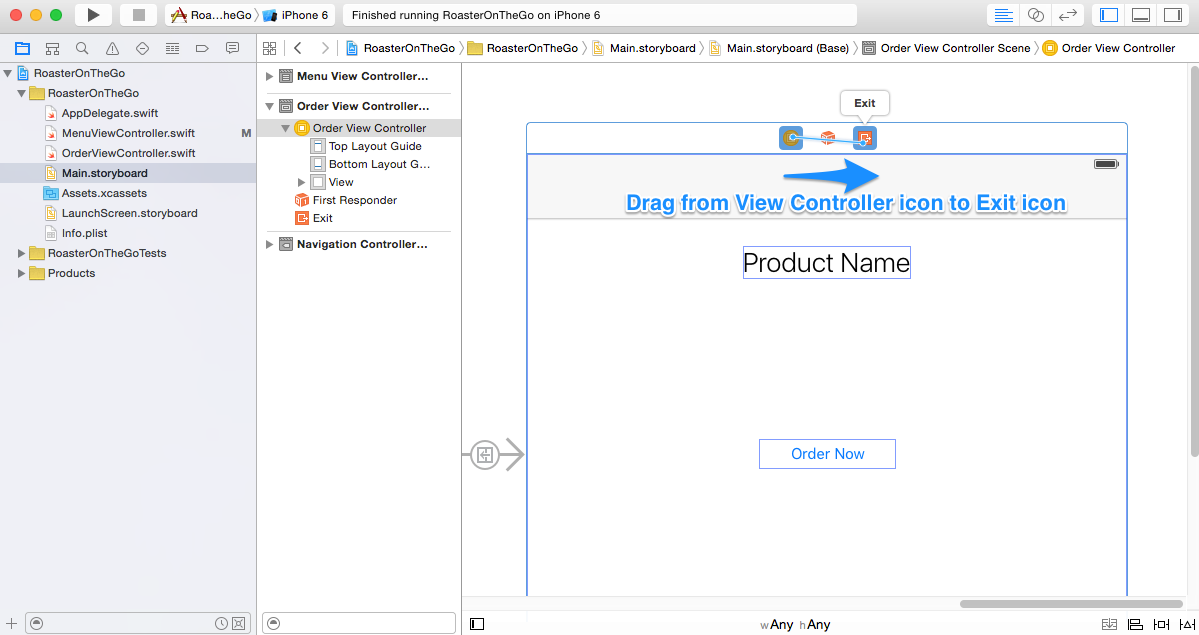
Here, you’re going to be looking at the screen that you’re going to unwind from. In the running example, this will be the Order View Controller’s scene in the Storyboard.
To wire up the OrderViewController to its unwind segue, you need to right-click and drag (or control + drag) from the View Controller icon to the Exit icon in the Storyboard Scene:
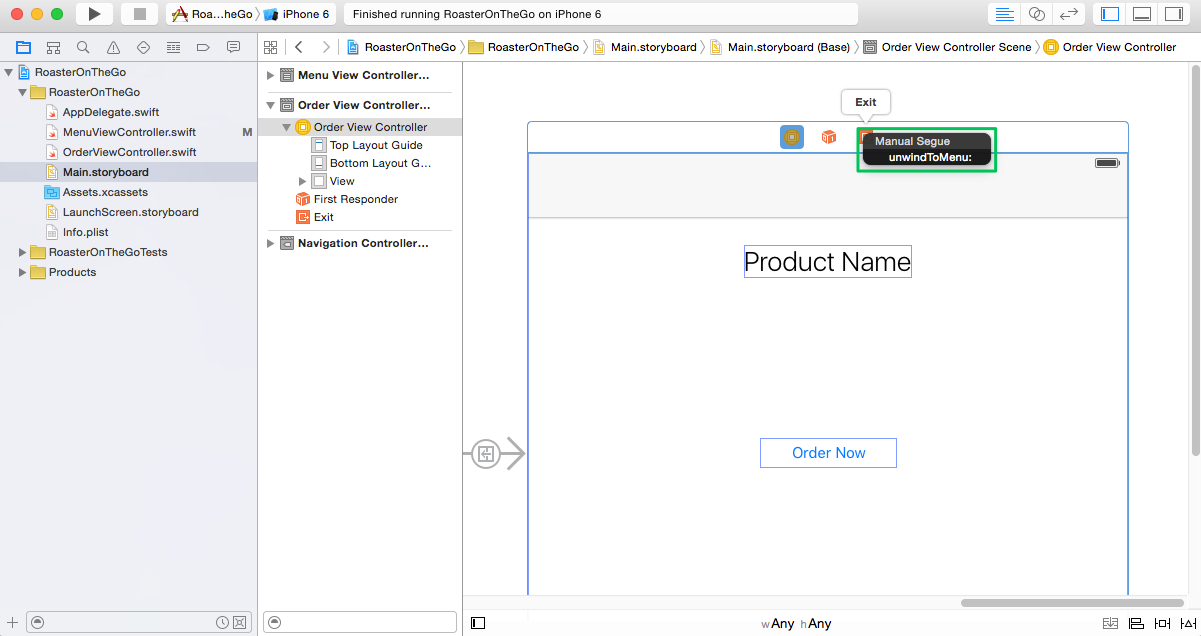
You’ll be presented with list of IBActions to connect to. You’ll choose the unwind segue action that was created in step 1:
3 – Specify a segue identifier
For this step, you’ll want to make sure that the Document Outline of the Storyboard is expanded. This will allow you to easily select the unwind segue in the outline, and specify its identifier in the Attributes Inspector of the Utilities Pane:
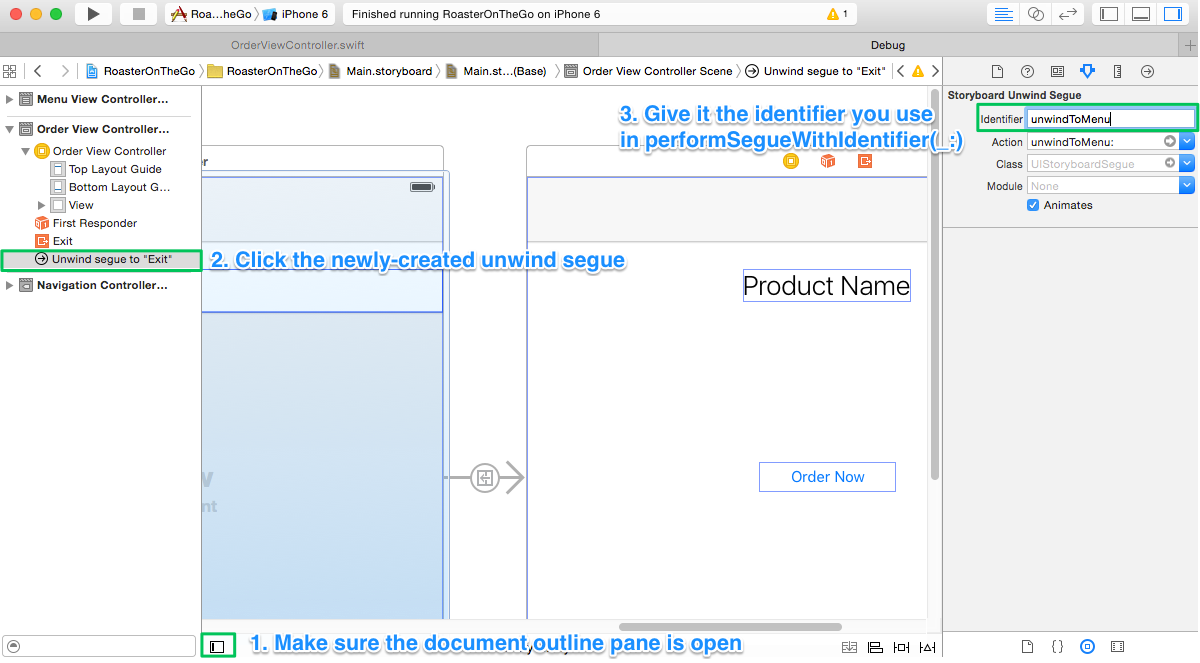
Since we want to take the user back to the menu when placing an order is finished, we’ll give it the identifier of “unwindToMenu”.
4 – Trigger unwind segue programmatically
The final step is to write a bit of code to trigger the unwind segue at the appropriate time.
In our example, we want to trigger it when the user taps on the ‘OK’ button of the alert. Here’s a snippet of code that will accomplish that task:
 1@IBAction func orderButtonTapped(_ sender: UIButton) {
 2    let alert = UIAlertController(title: "Order Placed!", message: "Thank you for your order.\nWe'll ship it to you soon!", preferredStyle: .alert)
 3    let OKAction = UIAlertAction(title: "OK", style: UIAlertActionStyle.default, handler: {
 4        (_)in
 5        self.performSegue(withIdentifier: "unwindToMenu", sender: self)
 6    })
 7
 8    alert.addAction(OKAction)
 9    self.present(alert, animated: true, completion: nil)
10}
Wrapping up
Whenever you need to programmatically trigger backward navigation in your app, using an unwind segue can be a great feature to take advantage of. This walk-through took you step-by-step through working with unwind segues in Swift.