I am the author of iOS 17 Fundamentals, Building iOS User Interfaces with SwiftUI, and eight other courses on Pluralsight.
Deepen your understanding by watching!
Custom UITableViewCell for Text Input in Swift
The need to collect data via text input is a common in many applications. This walk-through showcases how to create a custom UITableViewCell for accepting text input within a UITableView.
Table Views for Data Entry?
Table views provide nice, built-in styles that present a form-like view for collecting data from your users. They also have inherent scrolling capabilities. Finally, there is some handy keyboard handling, such as auto-scrolling to avoid covering up a data entry cell, or hiding the keyboard when the user scrolls the Table View. Both of those are challenging to get right if you were to do implement a data entry form some other way.
Many of Apple’s own UIs utilize table views to collect data from the user (think Settings, Calendar, Reminders).
For those reasons, I think a table view is a really convenient choice for collecting data from a user.
Step by Step Walkthrough
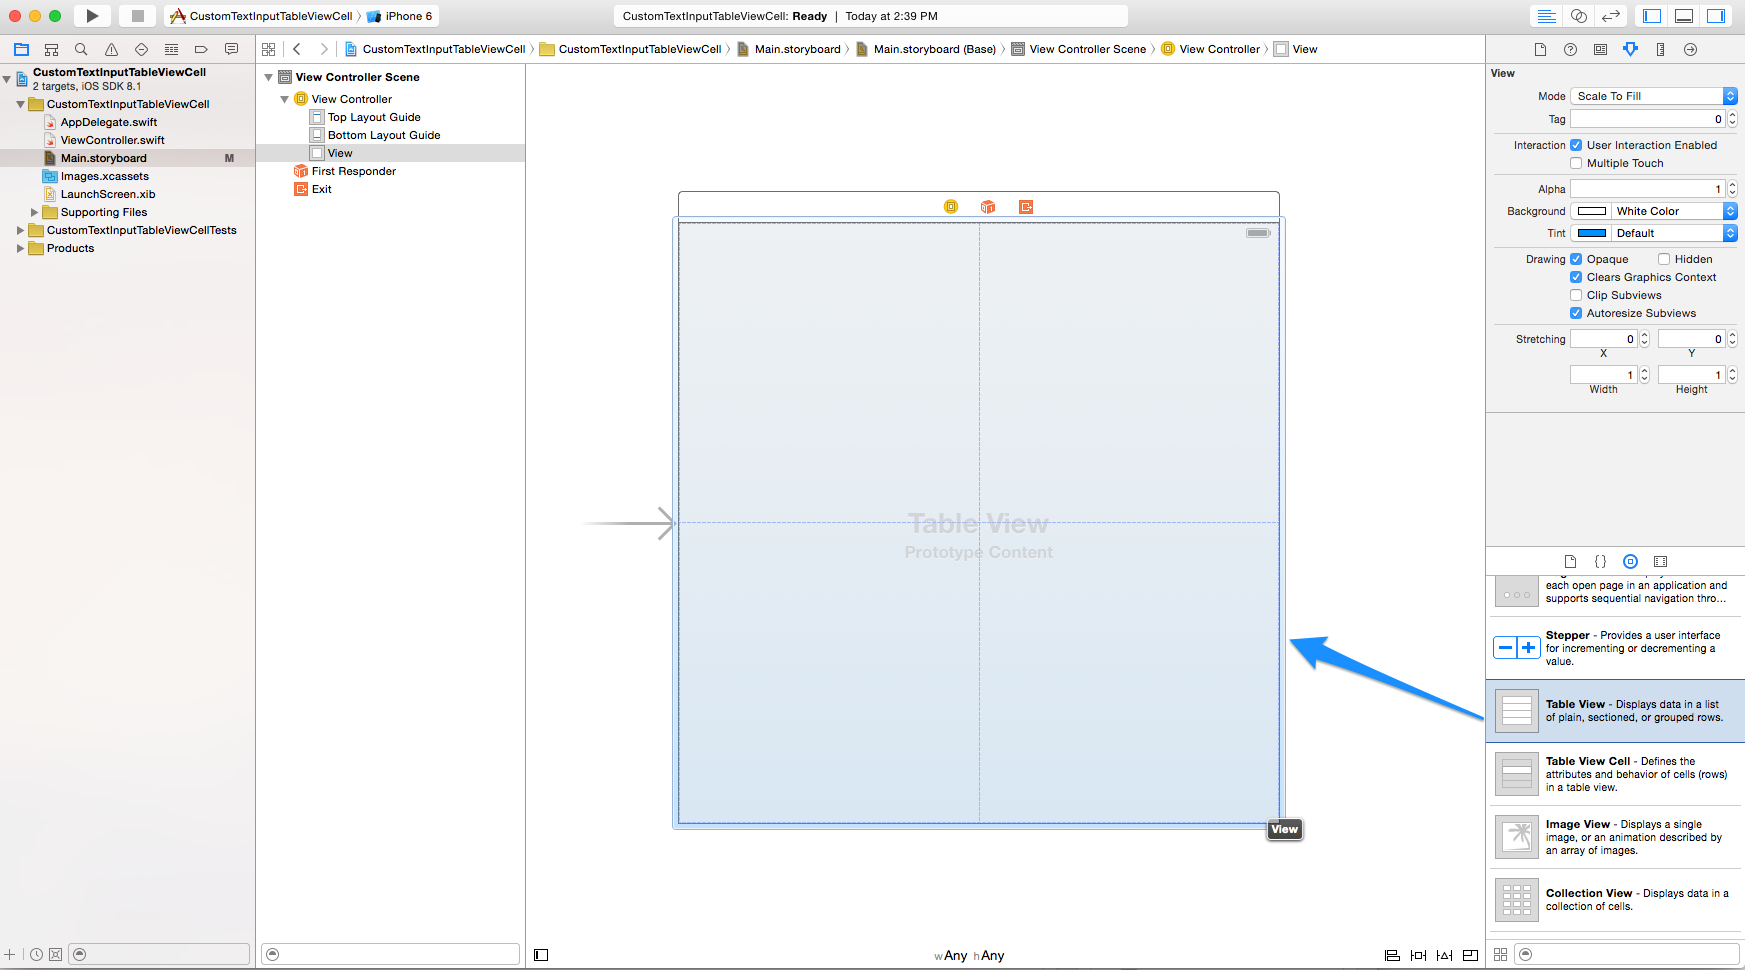
Drag a table view to Storyboard
Assuming that you have a View Controller already on the Storyboard design surface, drag a table view onto the Storyboard scene.
Wire up table view data source and delegate
For this step it’s helpful to have the document outline pane visible. Selecting the Table View from the document outline and subsequently Control + Click + Dragging to the View Controller icon on the Storyboard scene will allow you to link the table view’s dataSource and delegate properties to the View Controller.
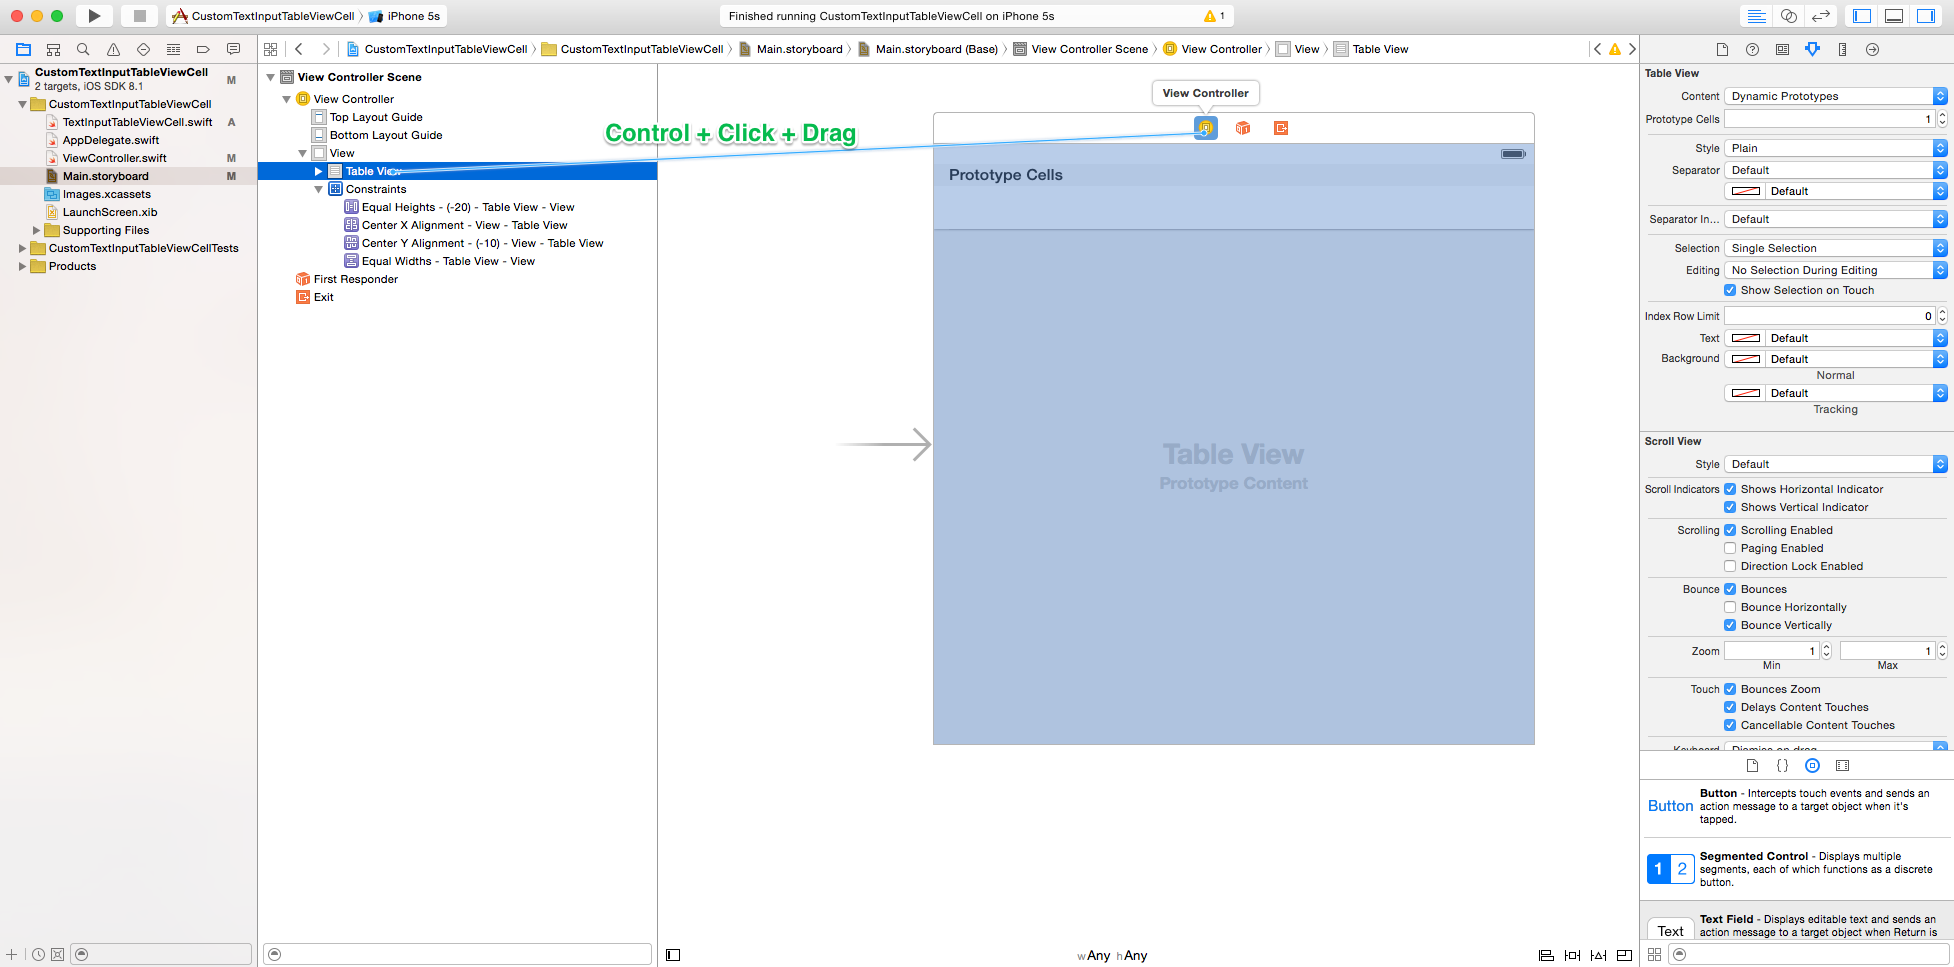
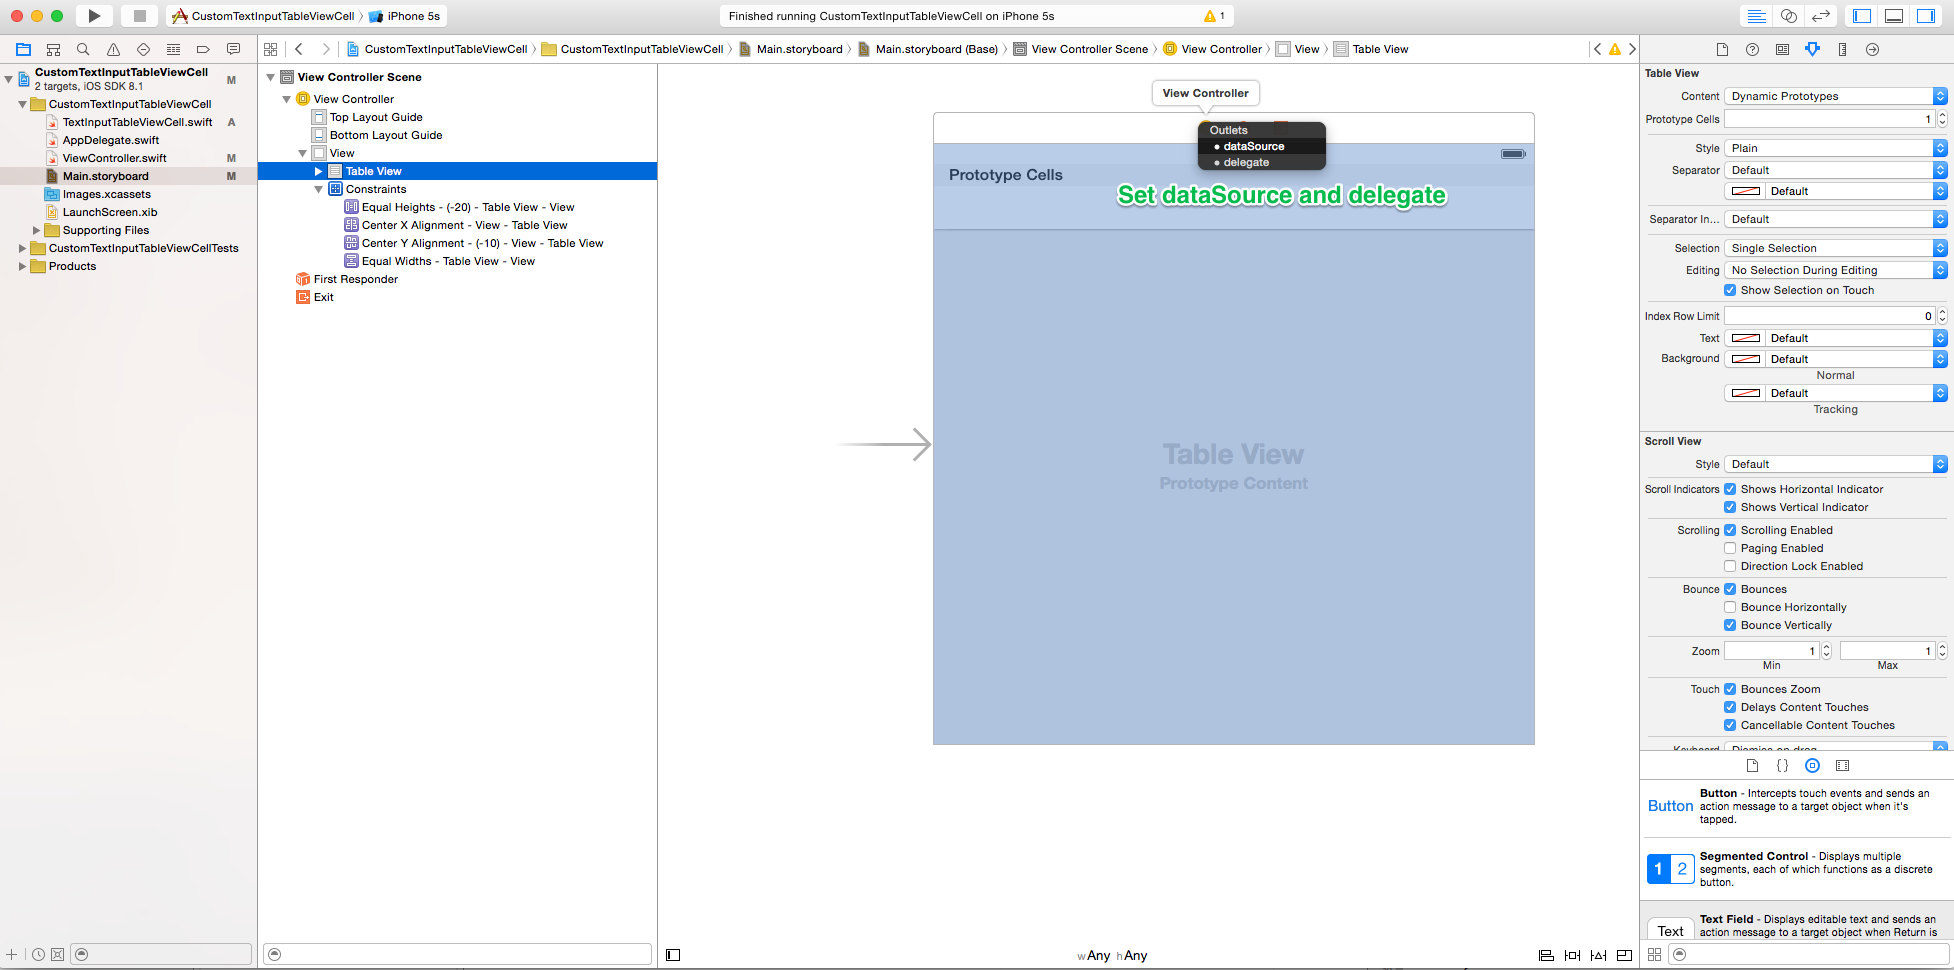
Note that you’ll need to perform the Control + Click + Drag maneuver twice to set both the dataSource and the delegate.
Configure keyboard dismissal for table view
With the attributes inspector selected in the utilities pane, scroll down to the Keyboard option and set it to “Dismiss on drag”.
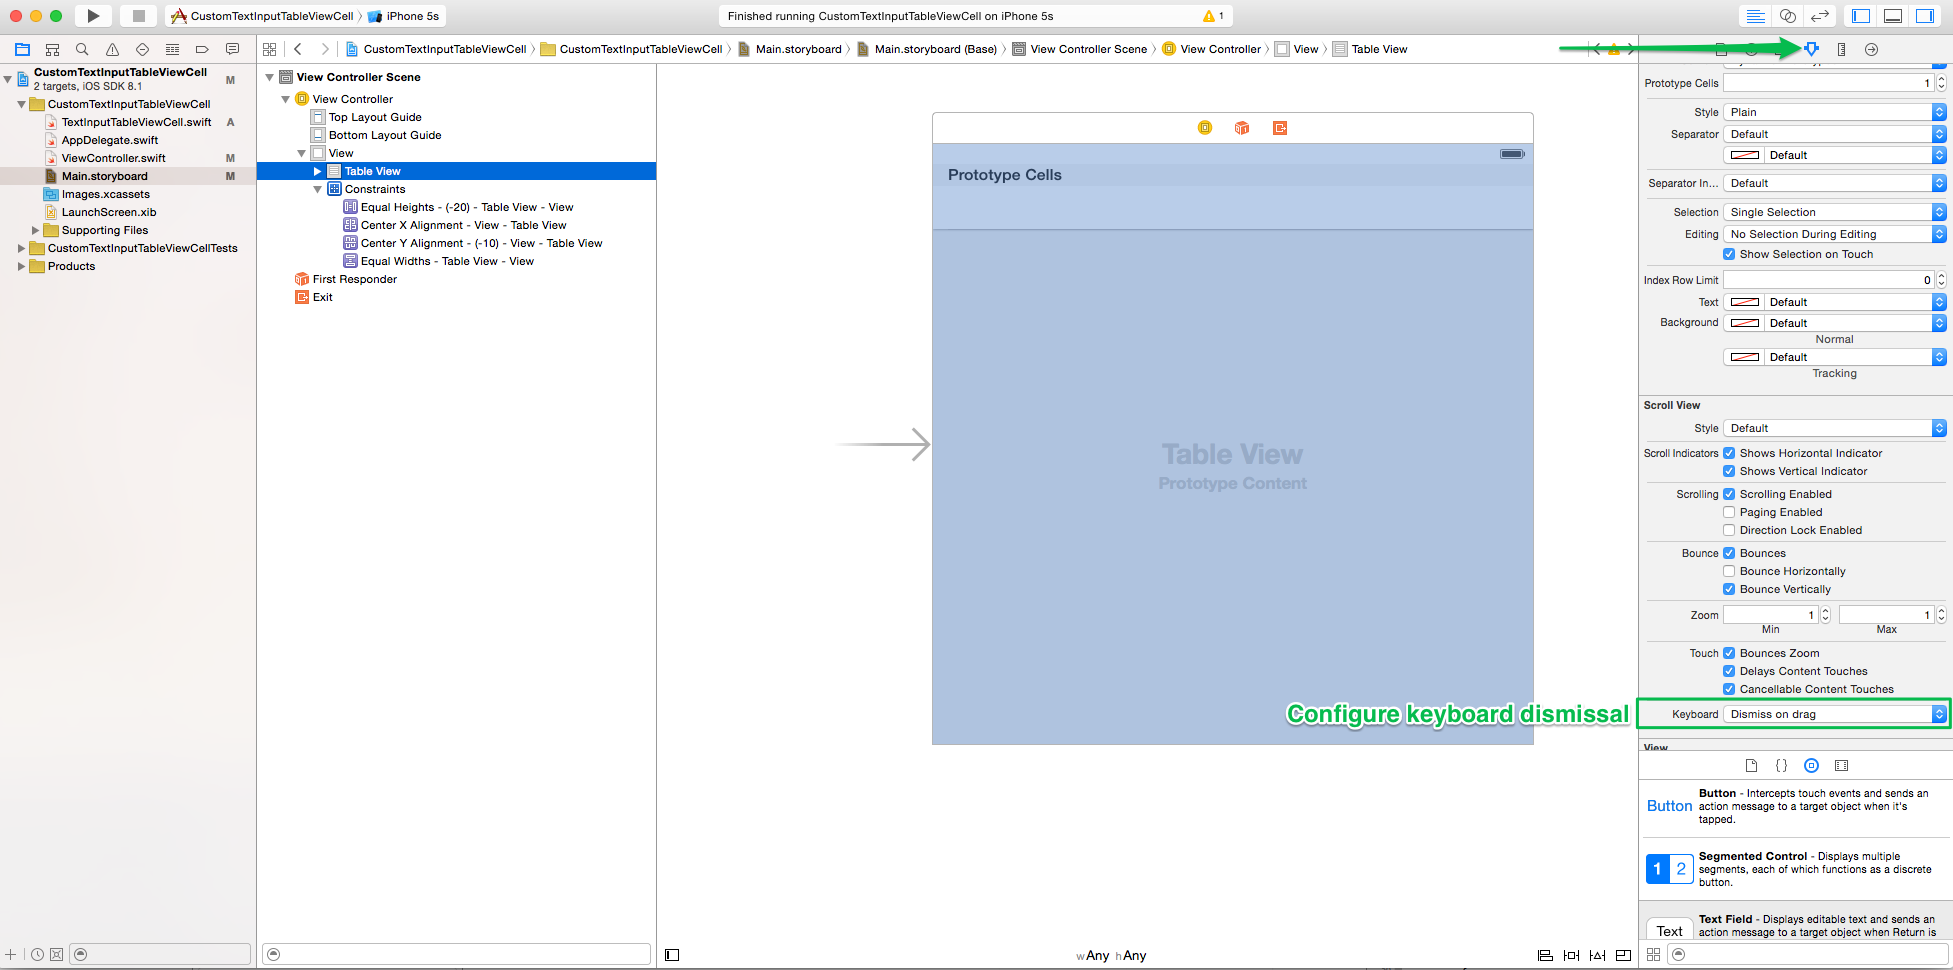
This can be helpful if you’d like the keyboard to automatically hide itself when the user scrolls the table view.
Set constraints, increase prototype cells count
Use the document outline to set constraints. With the attributes inspector selected in the utilities pane, select “Dynamic Prototypes” for the Content property, and set the Prototype Count property to 1 (or more, depending on your needs).
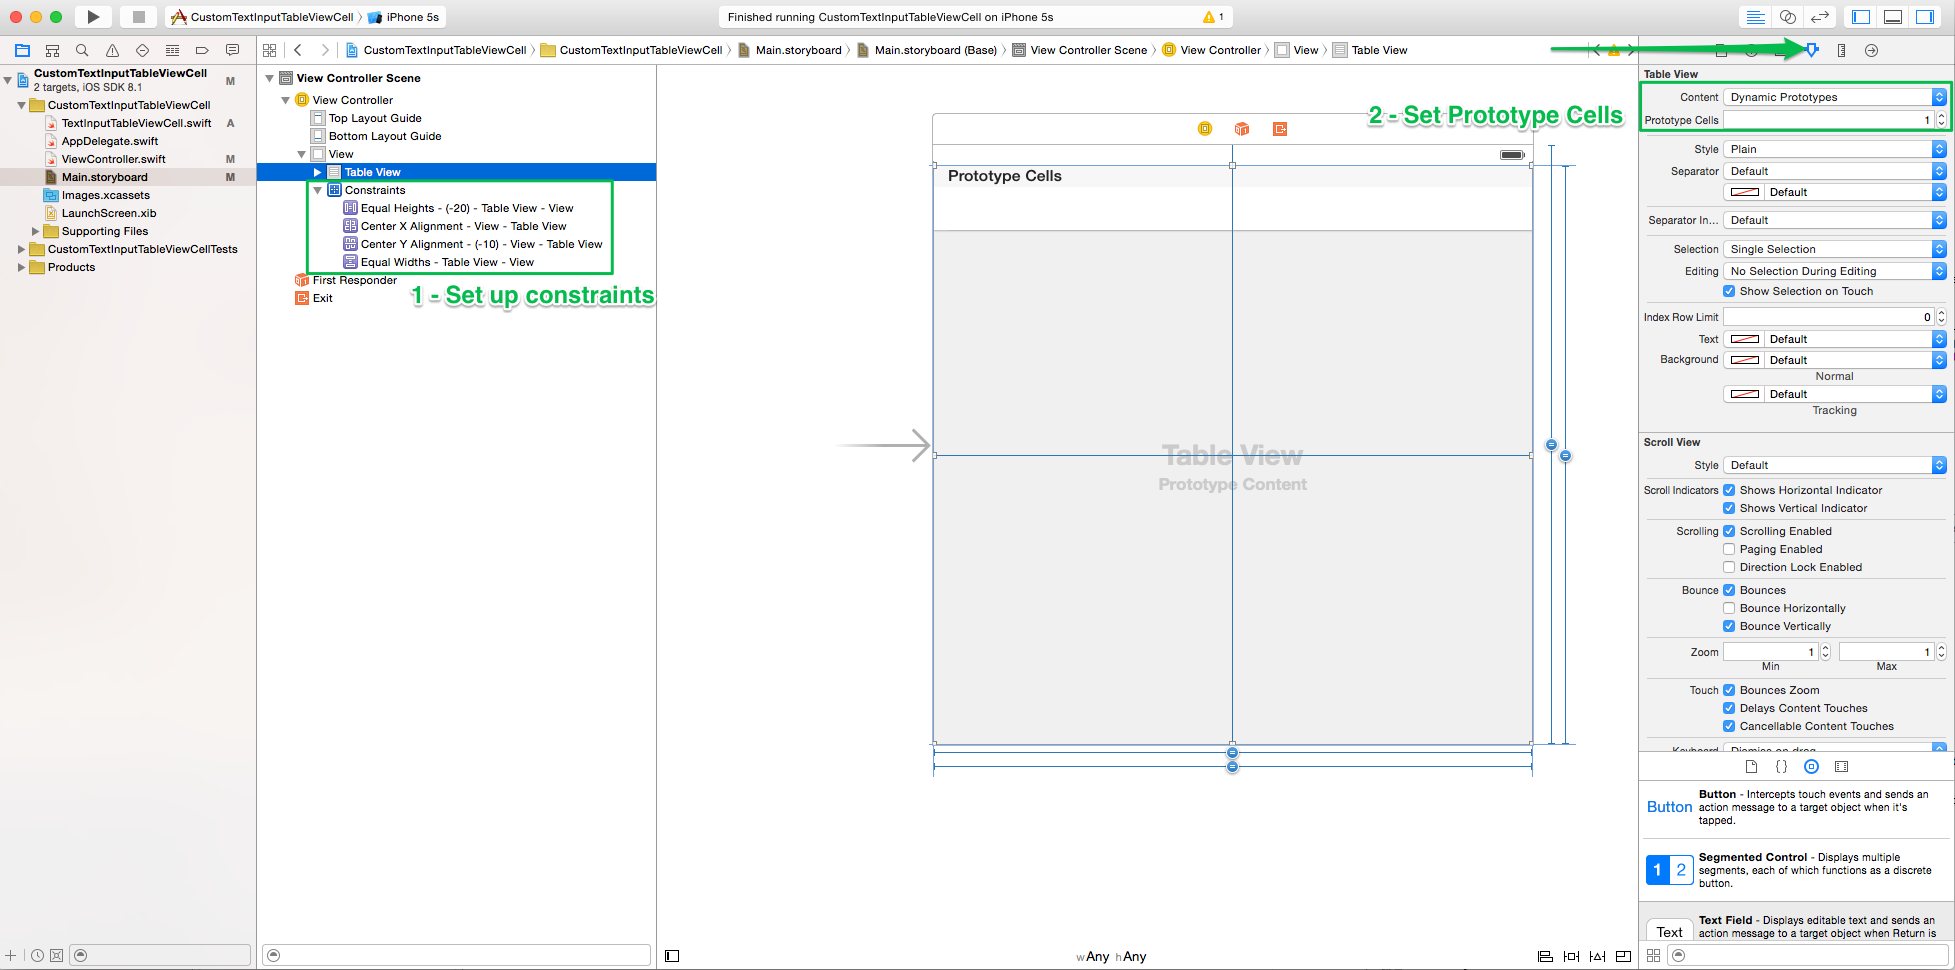
Configuring constraints on the table view will ensure that it displays properly on all device sizes and orientations.
In this particular example, there’s only one kind of prototype cell that I want the table view to display. If I had multiple prototypes, I’d increase the prototype cells count to match the number of prototypes I had.
Drag text field to cell, increase text field width
Drag a text field into the cell’s contents and use Xcode’s blue guides to adjust the width so that it takes up the whole cell.
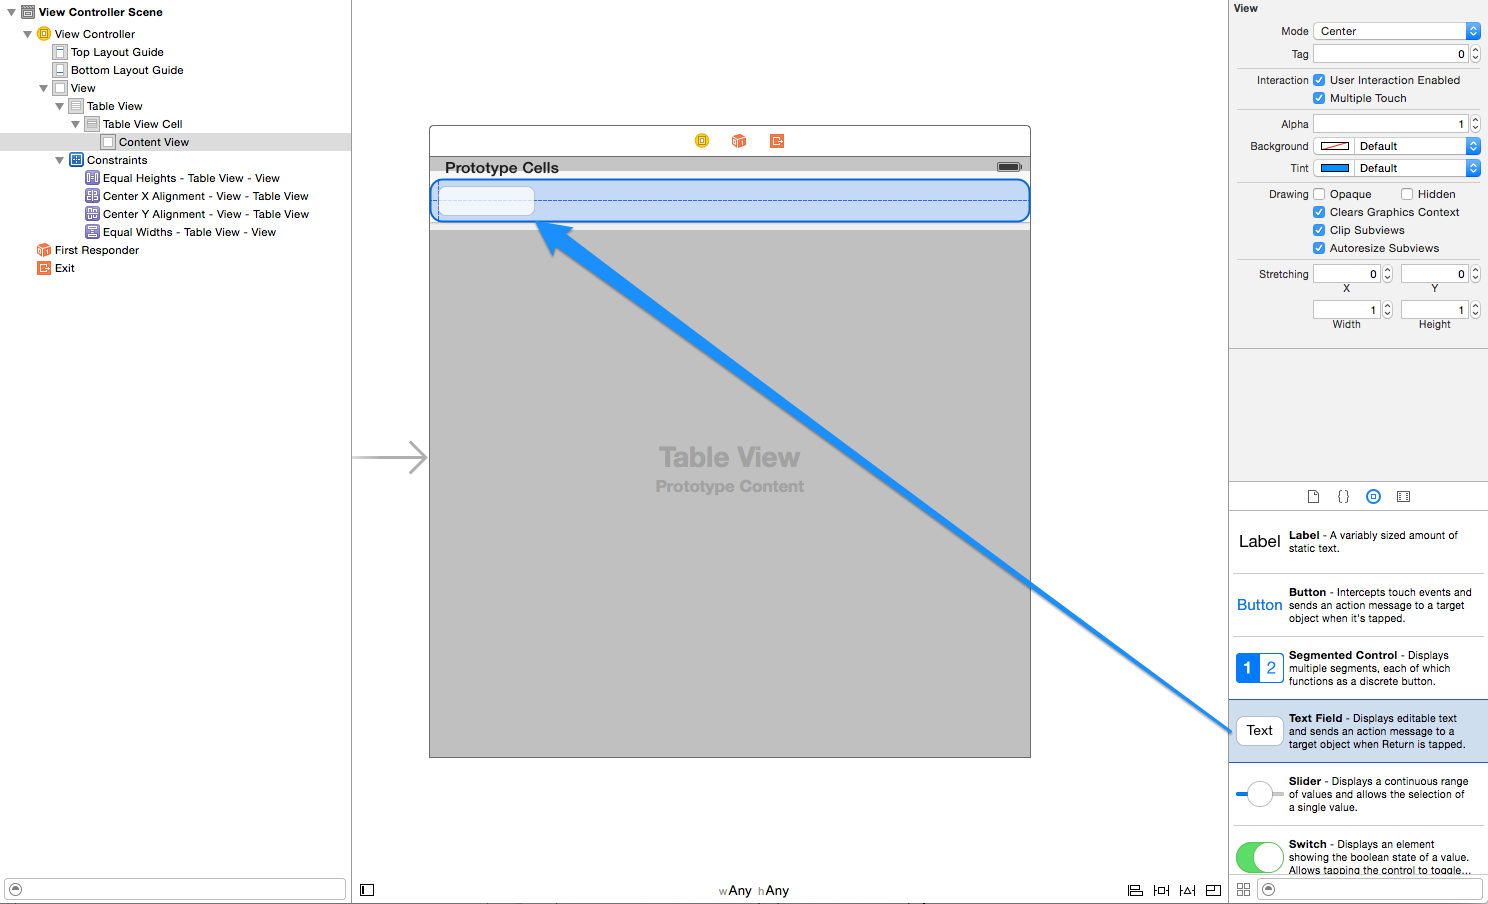
Now comes the customization of the prototype cell itself. Since we’re designing it for text input, we’ll use a text field as the contents of the table view cell prototype.
Configure Text Field Constraints and Border
Use the document outline to set constraints for the text field. With the text field selected, and the attributes inspector selected in the utilities pane, set the Border Style property to the style you prefer.
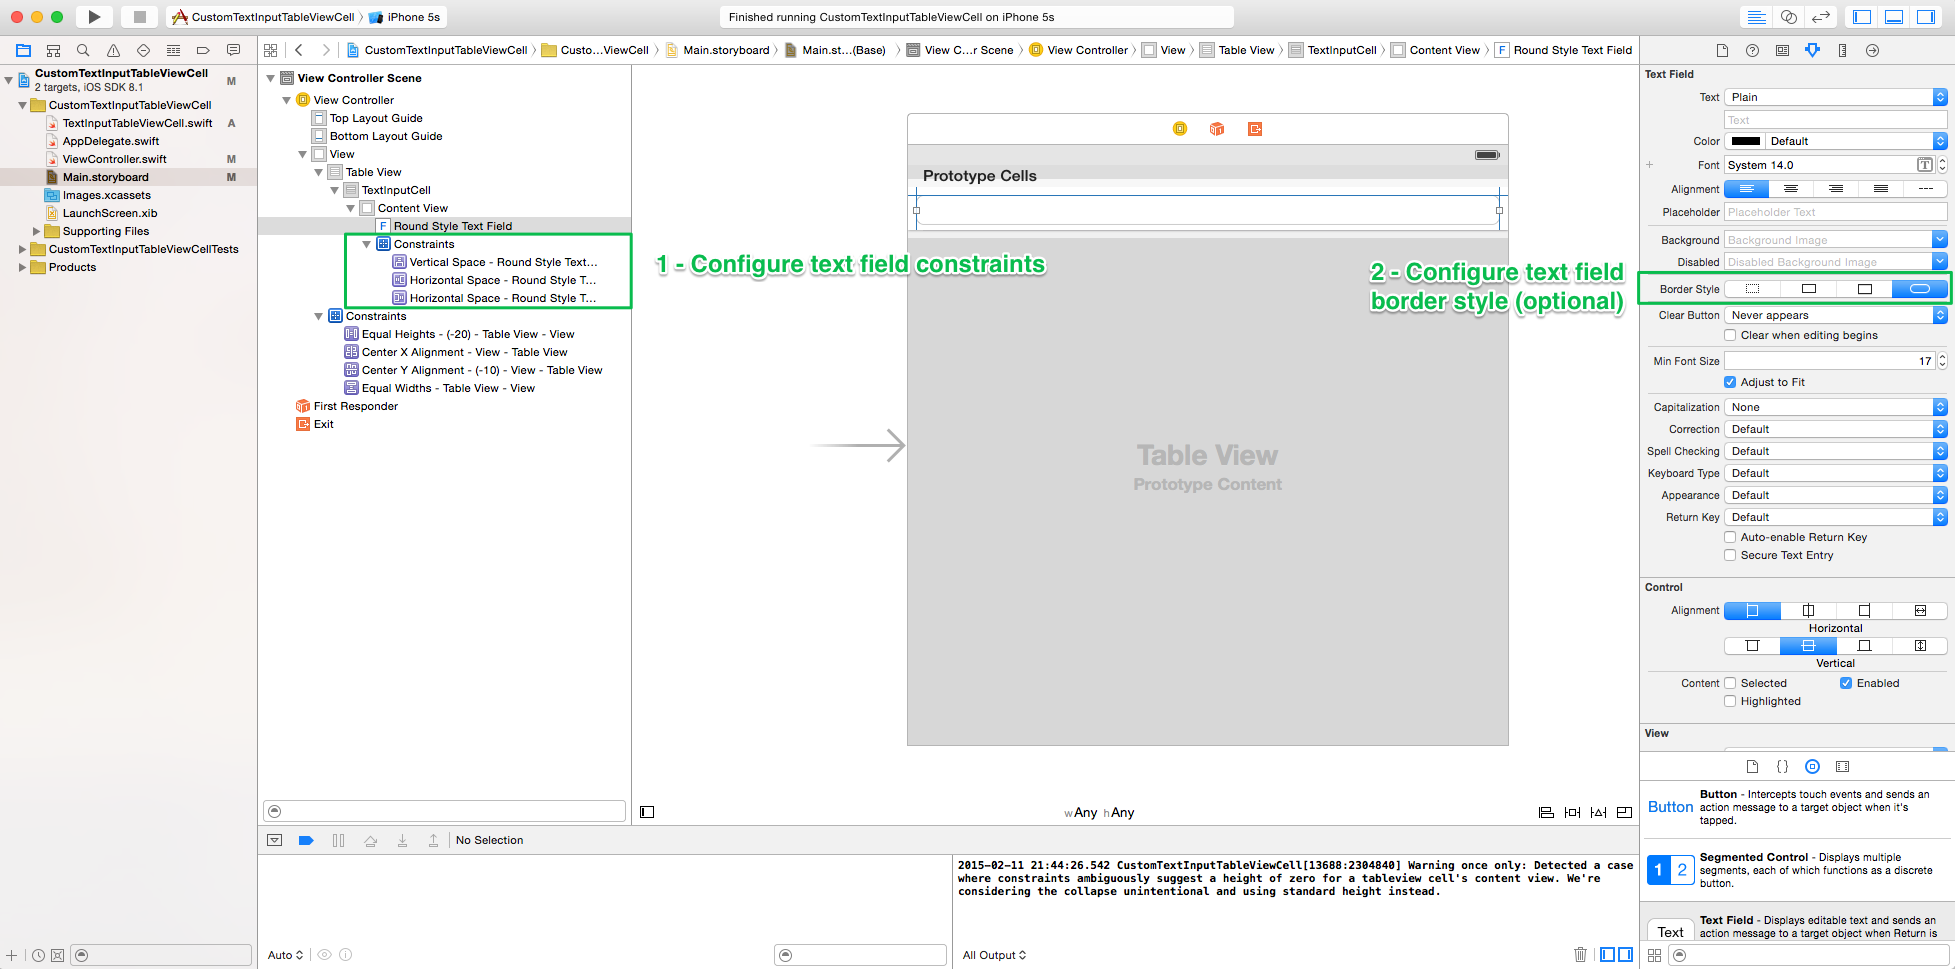
Configuring constraints on the text field will ensure that it displays properly on all device sizes and orientations.
Depending on your taste / needs, you can change the border style from rounded to none, or whichever other border style is most appealing for your app.
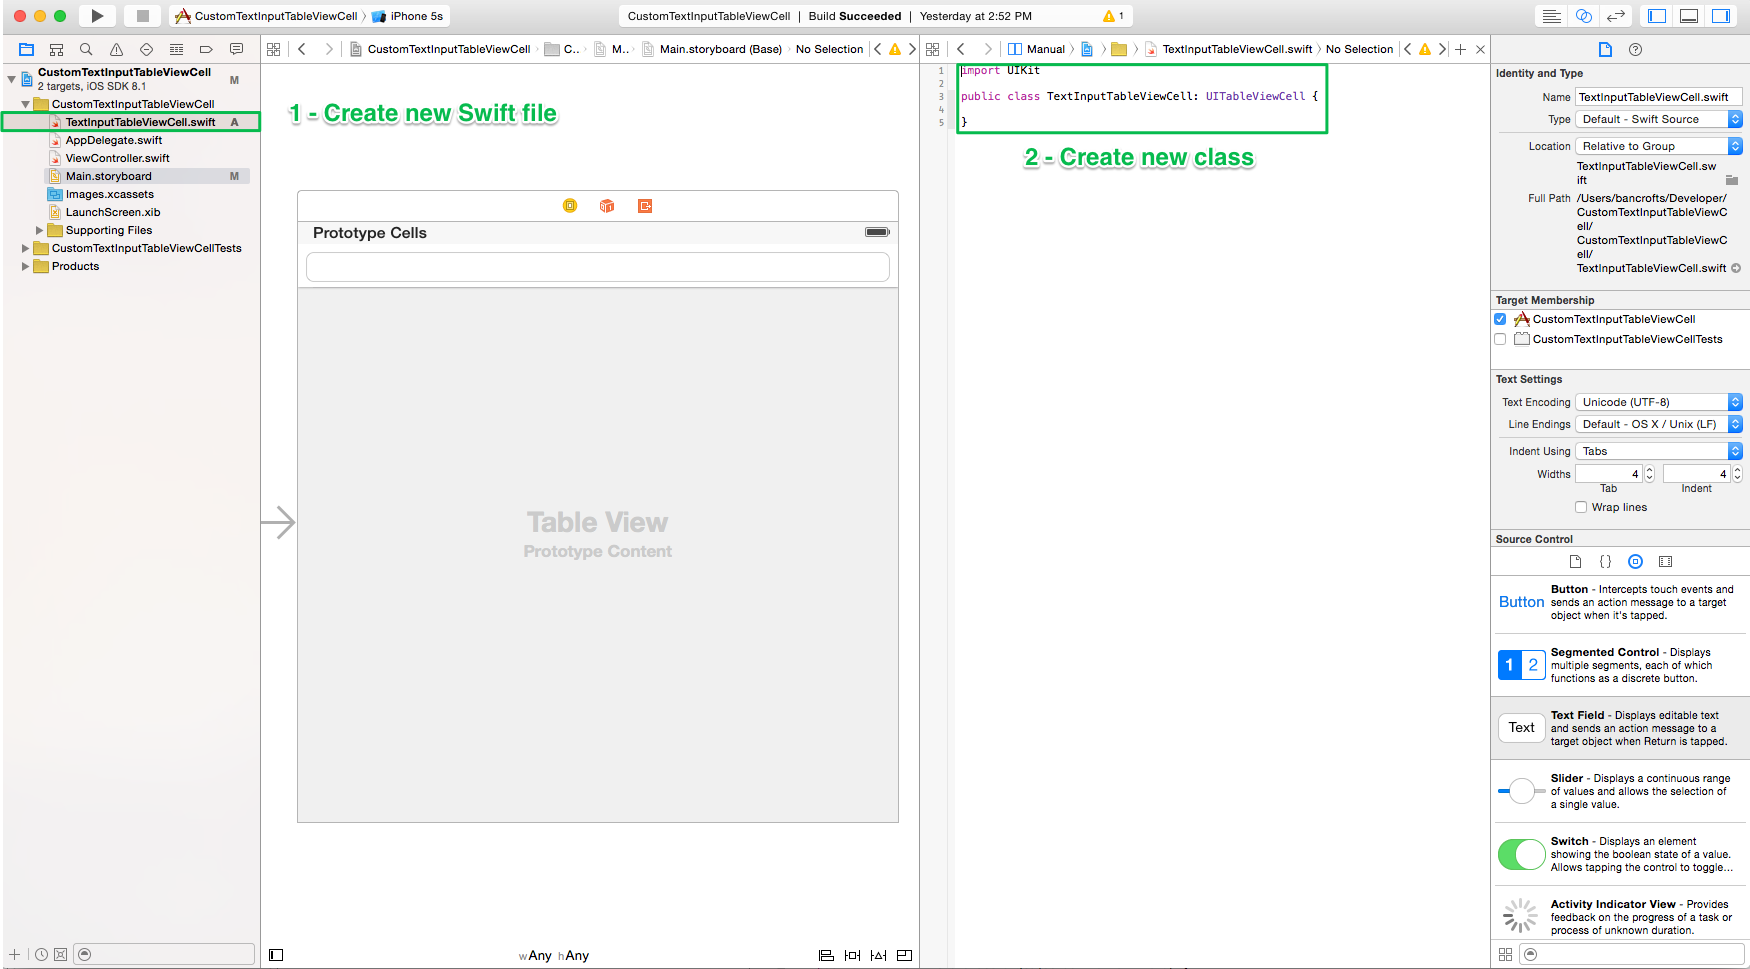
Create new TextInputTableViewCell class
Add a new .swift file named TextInputTableViewCell to your project. Create a new class in that file called TextInputTableViewCell which inherits from UITableViewCell.
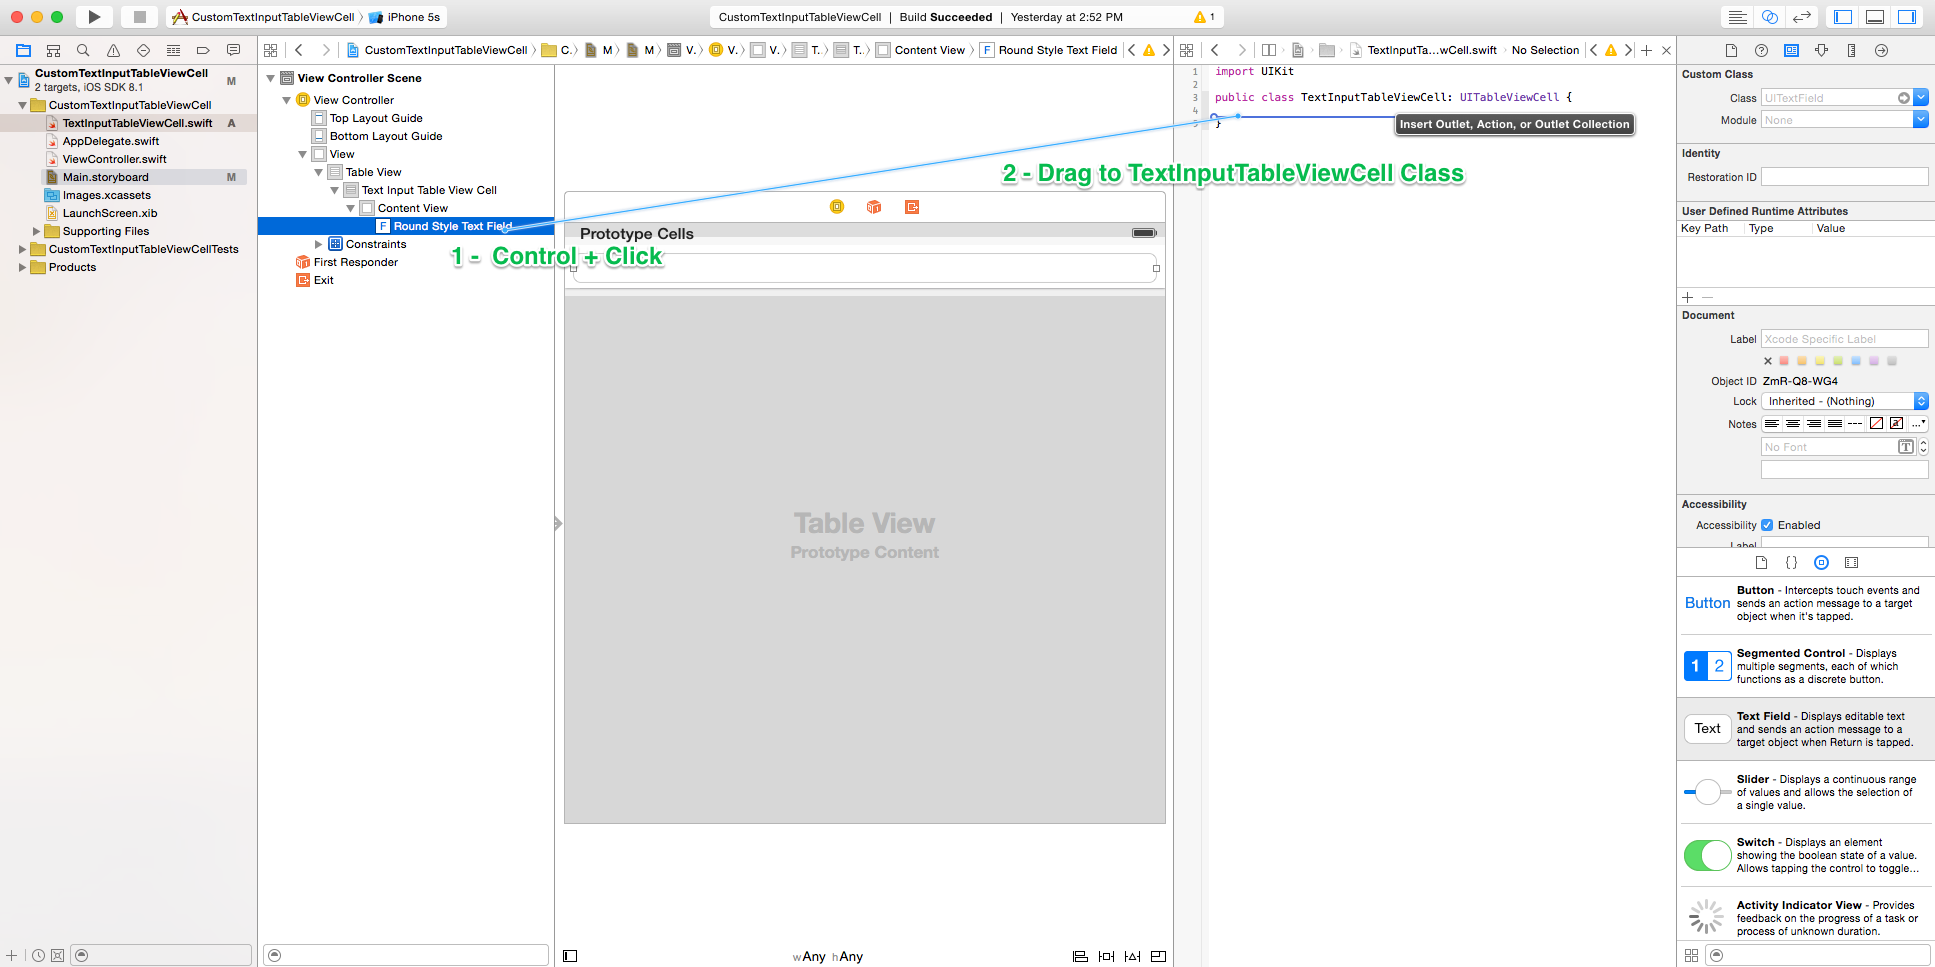
Create an IBOutlet between the text field and the TextInputTableViewCell class
Use the document outline to Control + Click + Drag and IBOutlet to the TextInputTableViewCell class.
Implement TextInputTableViewCell class
An example implementation with a function for configuring the text field’s properties might look something like this:
 1import UIKit
 2
 3public class TextInputTableViewCell: UITableViewCell {
 4    @IBOutlet weak var textField: UITextField!
 5
 6    public func configure(#text: String?, placeholder: String) {
 7        textField.text = text
 8        textField.placeholder = placeholder
 9
10        textField.accessibilityValue = text
11        textField.accessibilityLabel = placeholder
12    }
13}
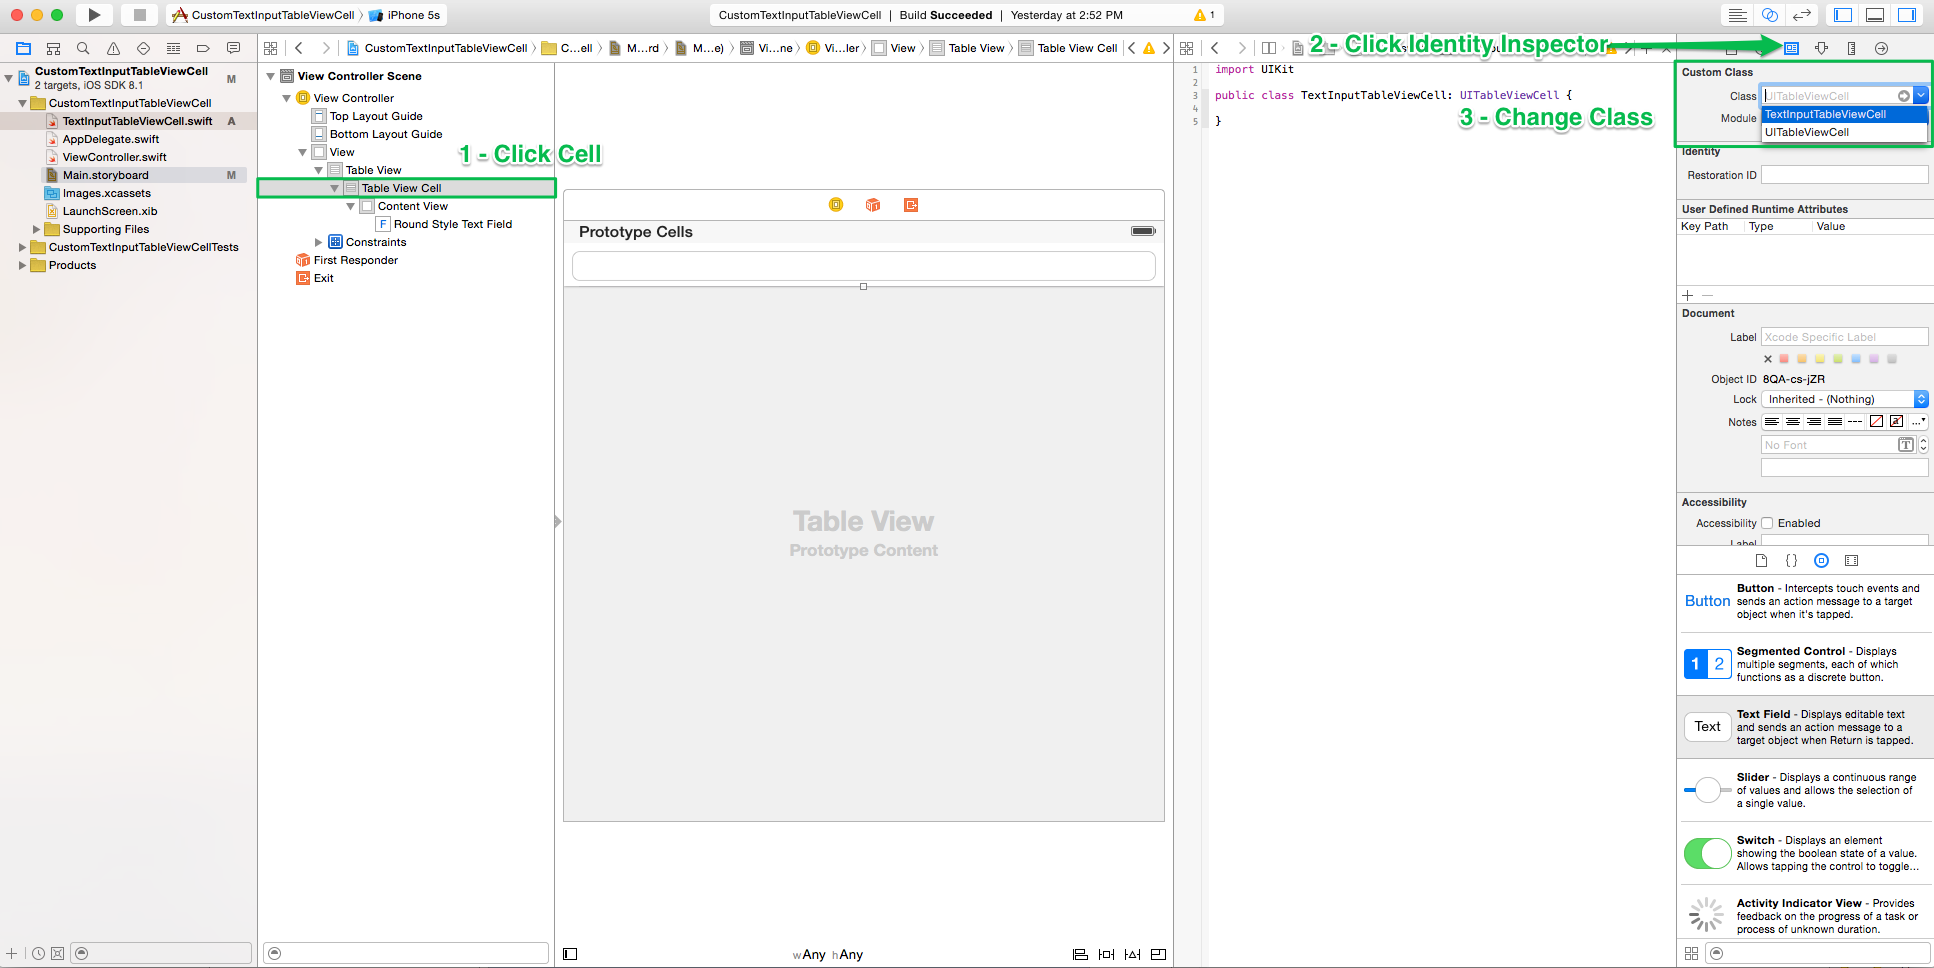
Change cell class in Storyboard to TextInputTableViewCell
Use the document outline to select the Table View Cell. With the identity inspector selected in the utilities pane, change the Class property to your TextInputTableViewCell class.
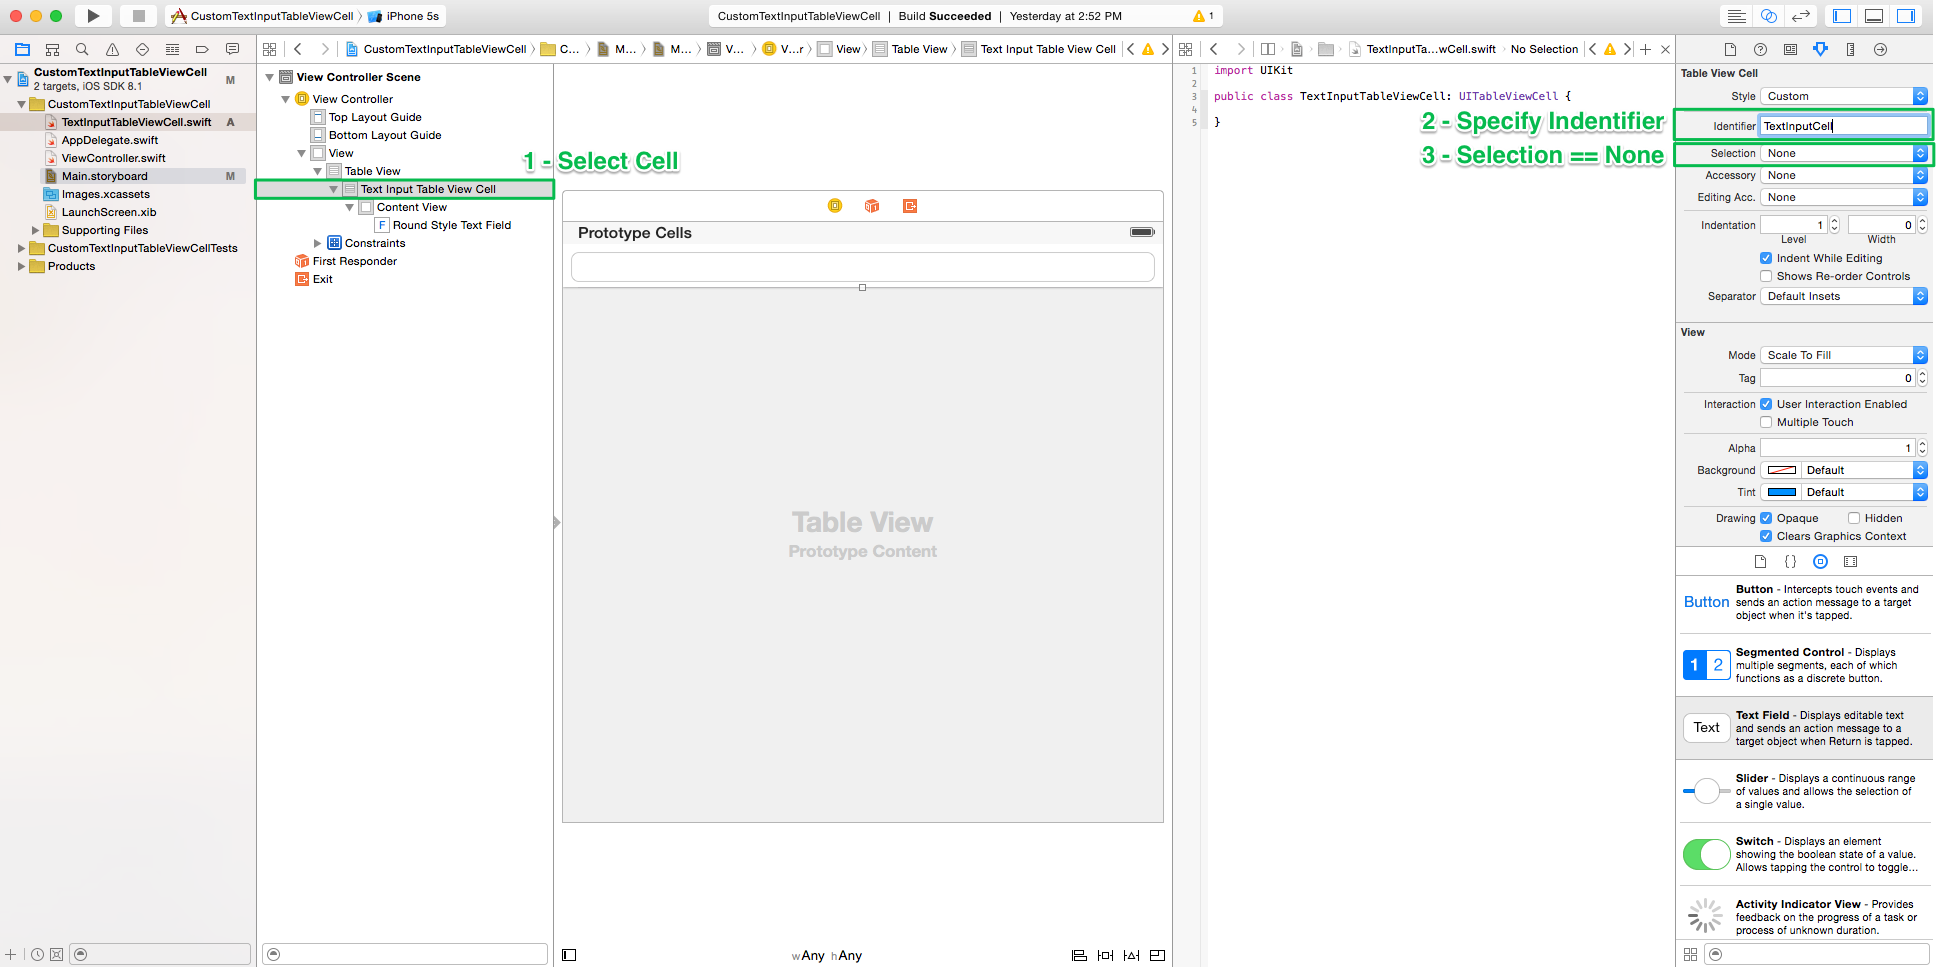
Set reuse identifier
With the Table View Cell still selected in the document outline, select the attribute inspector in the utilities pane and change the Identifier property to “TextInputCell” (or some other string that’s easily remembered).
Implement table view data source and delegate methods
In the View Controller, specify that it adopts the UITableViewDataSource and UITableViewDelegate protocols. Implement the appropriate protocol methods.
I’ve written a cheat sheet for this, but I’ll also provide the following sample implementation of the mai ViewController class:
 1import UIKit
 2
 3public class ViewController: UIViewController, UITableViewDataSource, UITableViewDelegate {
 4    public func tableView(tableView: UITableView, numberOfRowsInSection section: Int) -> Int {
 5        return 1 // Create 1 row as an example
 6    }
 7
 8    public func tableView(tableView: UITableView, cellForRowAtIndexPath indexPath: NSIndexPath) -> UITableViewCell {
 9        let cell = tableView.dequeueReusableCellWithIdentifier("TextInputCell") as TextInputTableViewCell
10
11        cell.configure(text: "", placeholder: "Enter some text!")
12        return cell
13    }
14}
Lines 9 and 11 are of most importance. Notice that I’m dequeueing a TextInputCell, which is what I set the reuse identifier of my cell to be. I’m also casting the dequeued cell as a TextInputTableViewCell so that it can be configured (line 11)
Run in simulator

Wrapping up
In this walkthrough, my goal was to show how to take advantage of a table view’s inherent styles, scrolling capabilities, and keyboard handling to make form-like text input easier. We created a custom subclass of UITableViewCell to accomplish this task. Take a look at the example published to GitHub to dive in further and explore the walkthrough in more depth.