I am the author of iOS 17 Fundamentals, Building iOS User Interfaces with SwiftUI, and eight other courses on Pluralsight.
Deepen your understanding by watching!
Getting Started with Unit Testing in Swift
Getting set up to write unit tests in Swift, while not difficult, isn’t exactly intuitive. I’ve written several posts and gathered a few resources on unit testing in Swift, but I haven’t yet published a “getting started” guide until now.
Where does one get started with unit testing in Swift when they’ve never gotten started before? Here are 5 steps to help you successfully begin unit testing in Swift:
1 – Create your project
The obvious first step. If you don’t already have a project going, create a new one to organize the code for your app idea. Xcode 6 will automatically generate two “targets” for you. One will be your app’s main module and contains all the code which, when compiled, is meant to be run in the iOS simulator / on an iOS device.
The other will be your test target, which, as the name implies, is where you write your unit test code.
It’s important to note that there are two compilation targets that you’ll be working with as you unit test. Source code that’s part of one compilation target isn’t part of the other by default. This is important to at least know as we move forward in this walkthrough.
2 – Framework considerations: toggle “Defines Module” in your build settings
This step becomes especially critical if you’re using or plan to use a unit testing framework like Quick. It’s not required to use something like Quick, but it can enhance your testing experience if you prefer something other than the out-of-the-box XCTestCase setup.
When you’re working with frameworks, Apple recommends that you make sure the “Defines Module” build setting, found under Packaging, is set to Yes.
If you are relying on, or could be relying on “non-standard” .framework files for your app, make sure you toggle this flag in your Xcode build settings:

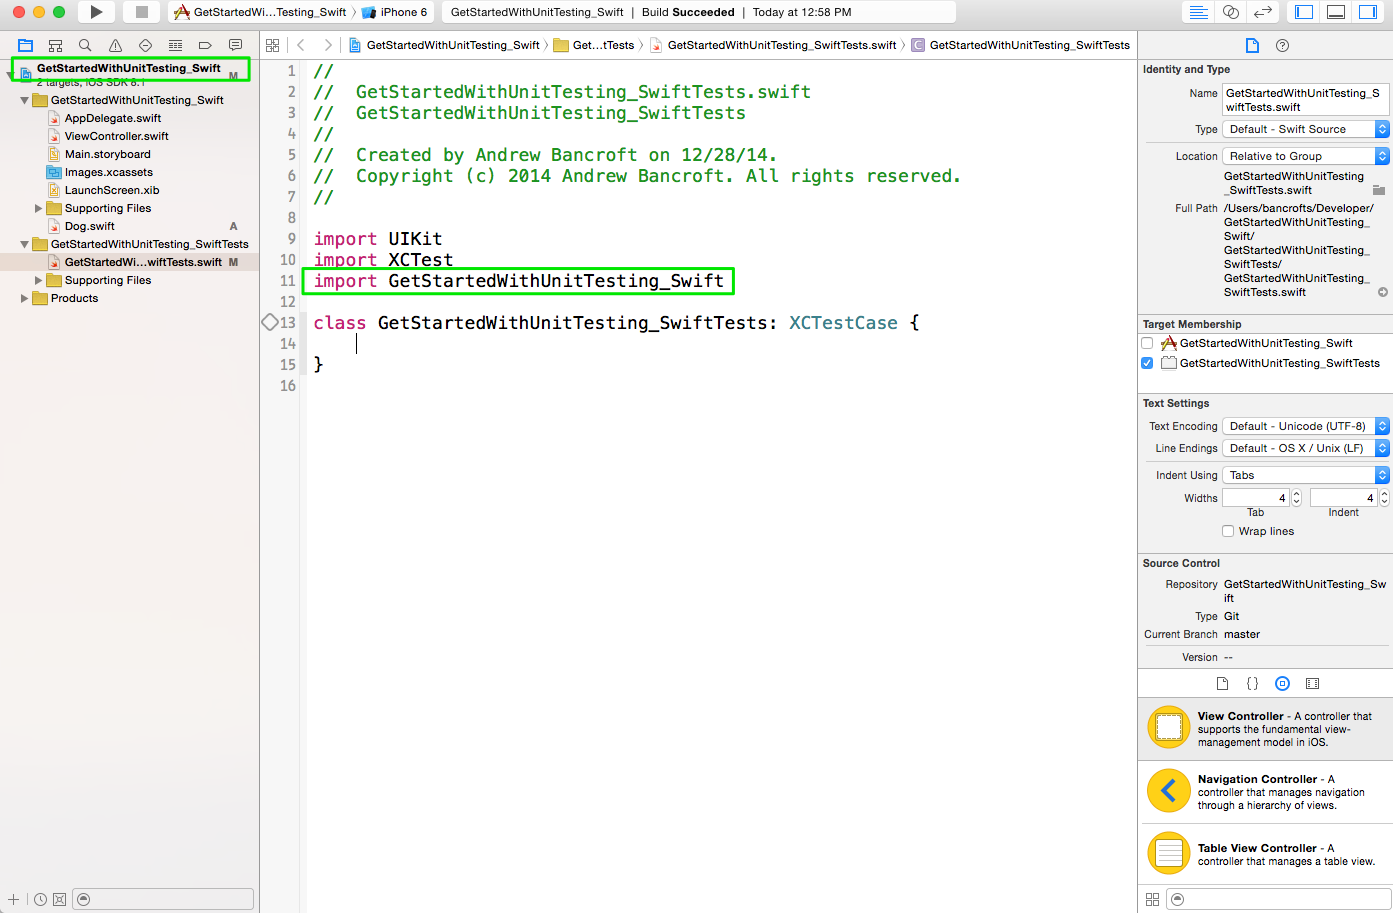
3 – Import your main project (module) into your test file(s)
In your test target, at the top of each of your .swift files that contain your XCTestCase classes, write an import statement to bring in your main project’s module. In normal scenarios, your app’s module is named the same as your Xcode project file.
4 – Access control: Public == Testable
Any classes/structs/enums/methods that you need to use in your tests must have a public access control modifier. Internal (default) and private Types and functions can’t be “seen” by your unit tests, so you need to go the public route if you want to test those things.
Previously I’d written on Swift access control and its implications for unit testing. There, I proposed simply adding your main project’s .swift source files to your test target, but it turns out that this can lead to some really obscure issues. An enlightening Twitter conversation also shed some light on the subject, and pointed to the solution of testing only publicly accessible behavior that your Types expose, rather than trying to test internal implementation. That probably deserves a blog entry of its own, but for now, I’ll leave it to say that I’d recommend not adding your .swift source files to your test target, but rather to adjust the access control modifiers of the things you want to test to public.
5 – Write tests!
With your main project imported into a test file, and your Types and functions declared with appropriate public accessibility, you’re all set to begin writing tests in Swift!
Summary
We’ve gone from 0 to ready-to-test in this getting started guide to unit testing in Swift. From here, you may be interested in pursuing other topics related to unit testing in Swift. Check out my ever-growing unit testing resource list for more information!