I am the author of iOS 17 Fundamentals, Building iOS User Interfaces with SwiftUI, and eight other courses on Pluralsight.
Deepen your understanding by watching!
Create Documentation for your Swift Playground
As I opened Apple’s latest “Patterns Playground” blog post, I was impressed with the look and feel. Rather than create the documentation as comment blocks, they managed to put in sharp-looking notes and explanations before each code example / experiment. It’s like an interactive book, reminiscent of the Swift Programming Language iBook! Here’s a snippet of what their Playground looks like:
[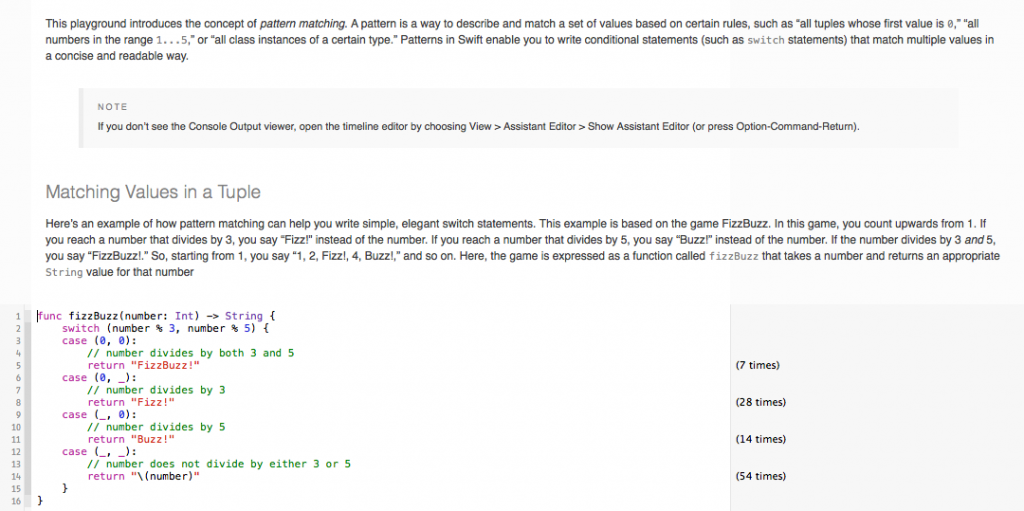 ][1]
][1]
Of course, my immediate question / thought was, “How’d they do that?! Can I do that? I want to do that!”. I didn’t know it at the time of this publication, but apparently Apple has some pre-release documentation out on developer.apple.com, detailing how all this is done. I (as usual) did it the hard way and hacked my way through it. I figured I’d go ahead and share my discoveries alongside the official documentation from Apple.
I’m already a believer in using Playgrounds for teaching. The read-example-experiment loop is so easy in the Playground environment. I think using this documentation technique has the potential to enhance the Playground experience even more to create professional, sharp-looking educational material_. _
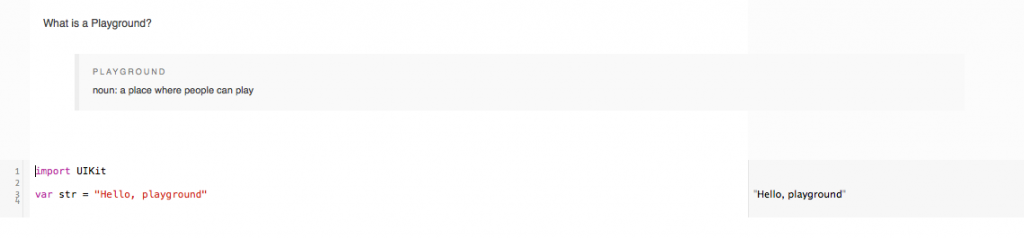
For this post, I wanted to take a simple example (the File -> New Playground playground) and convert the comment-style documentation into “fancy” documentation.
Before:
[ ][2]
][2]
After:
[ ][3]
][3]
Let’s explore.
The Gist
- Create yourself a playground (and note where you save it).
- Navigate to where the .playground file is saved in Finder.
- Right-click the .playground file, and choose “Show Package Contents”.
- Add a new folder named “Documentation”.
- Create a new HTML file in the Documentation folder. It should contain the HTML markup and the text explanation that you’d like to enhance your playground with. Make sure it is a well-formed HTML document by the time you’re finished creating it. I describe a quick way to jumpstart your documentation process at the end of this article…
- Although optional, I’d recommend styling your HTML file with appropriate CSS. Adding a CSS file and referencing it within the HTML file you created is probably a good idea (and this is allowed for Playground documentation).
- Open contents.xcplayground with the text editor of your choice by right-clicking and choosing “Open With”.
- Modify the XML so that the
element contains a node as shown in the highlighted code lines in the example below. Be sure to replace the relative-path value with the name of the HTML file you created in step 5 (I named mine “doc-fragment-0.html”):
9. Save, and open the playground in Xcode 6. Your Playground should now contain documentation!
As a way to jump-start my own Playground documentation, I simply borrowed one of the HTML files and the CSS file from Apple's Patterns Playground. Then I modified the markup to contain the educational material I wanted for _my_ playground, customized the styles to what I wanted, added the <span class="lang:default decode:true crayon-inline "><documentation></span> node to the contents.xcplayground file, saved, and voila: Fancy documentation!
[1]: http://www.andrewcbancroft.com/wp-content/uploads/2014/09/Patterns_playground.png
[2]: http://www.andrewcbancroft.com/wp-content/uploads/2014/09/MyPlayground_WithDocumentation_playground_before.png
[3]: http://www.andrewcbancroft.com/wp-content/uploads/2014/09/MyPlayground_WithDocumentation_playground_after.png